Developing the First Example Program Running on Hi3861
This example shows how to connect the WLAN module to the gateway using attention (AT) commands.
Building
This section describes how to perform the WLAN module building on a Linux server.
If the Linux environment is installed using Docker, perform the building by referring to Using Docker to Prepare the Build Environment. If the Linux environment is installed using a software package, perform the following steps:
-
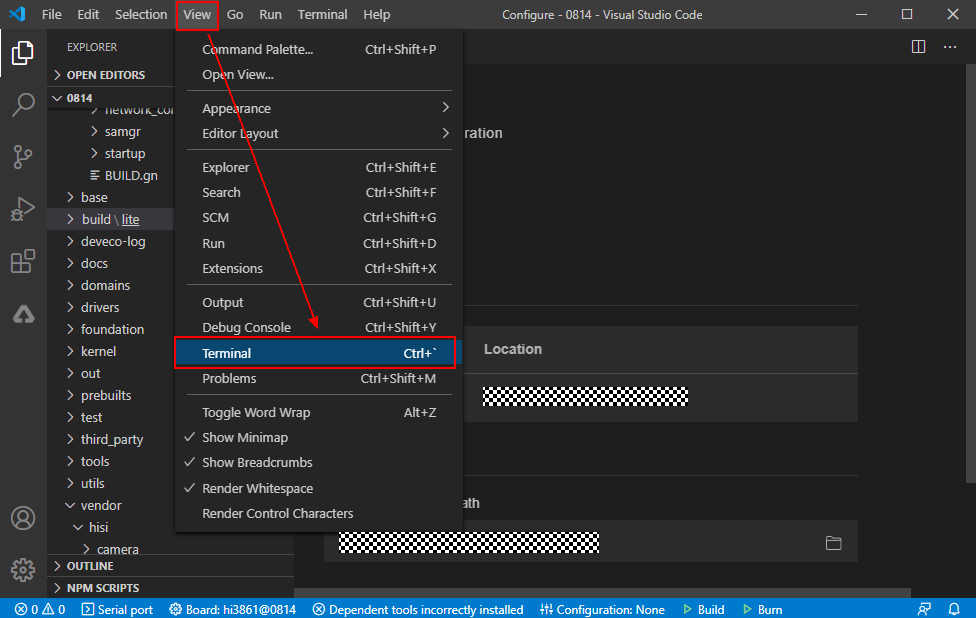
Open the HUAWEI DevEco Device Tool and choose View > Terminal.
Figure 1 Starting the IDE terminal tool
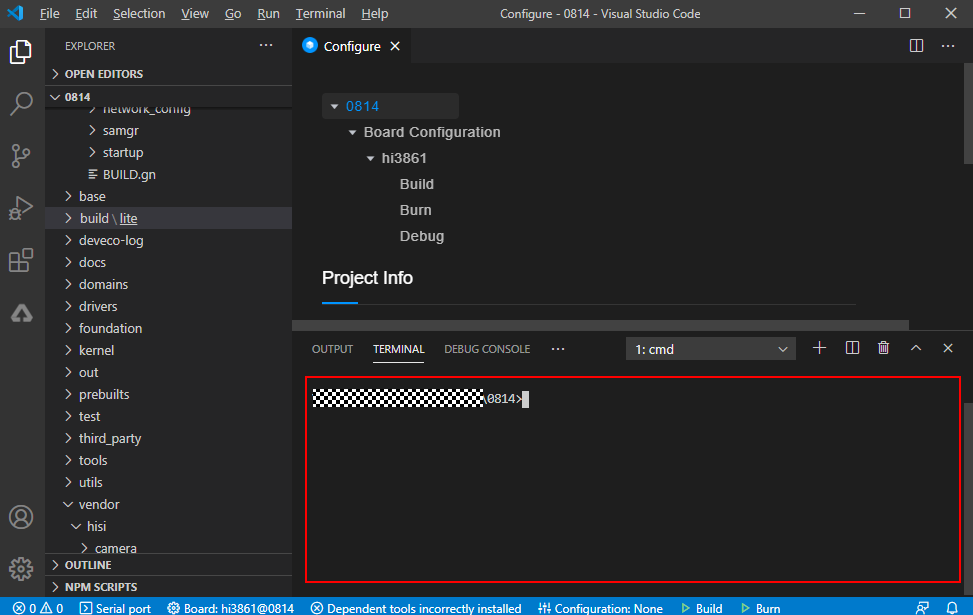
On the TERMINAL page, run the ssh command, for example, ssh user@ipaddr, to connect to the Linux server.
-
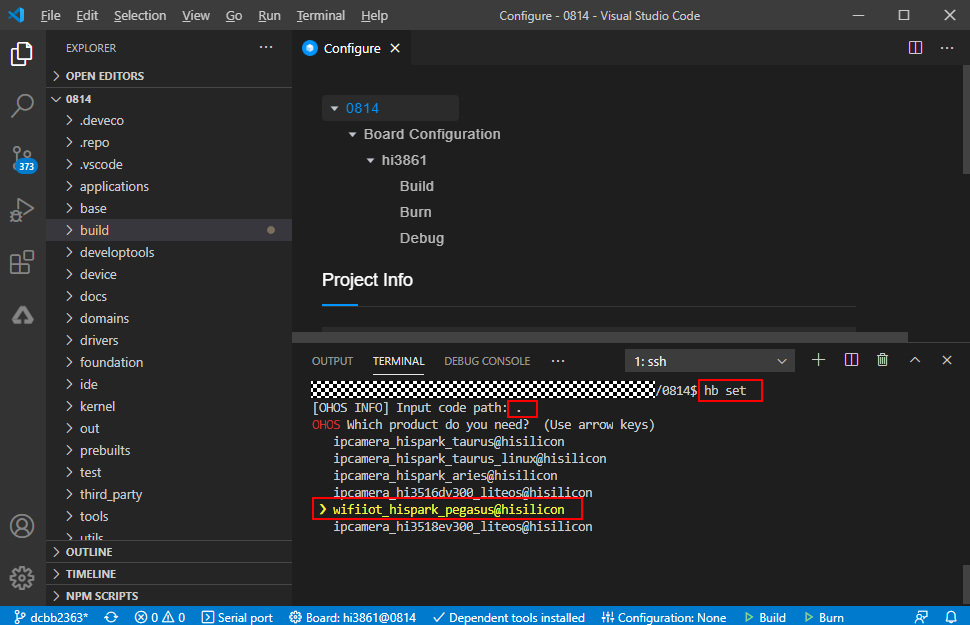
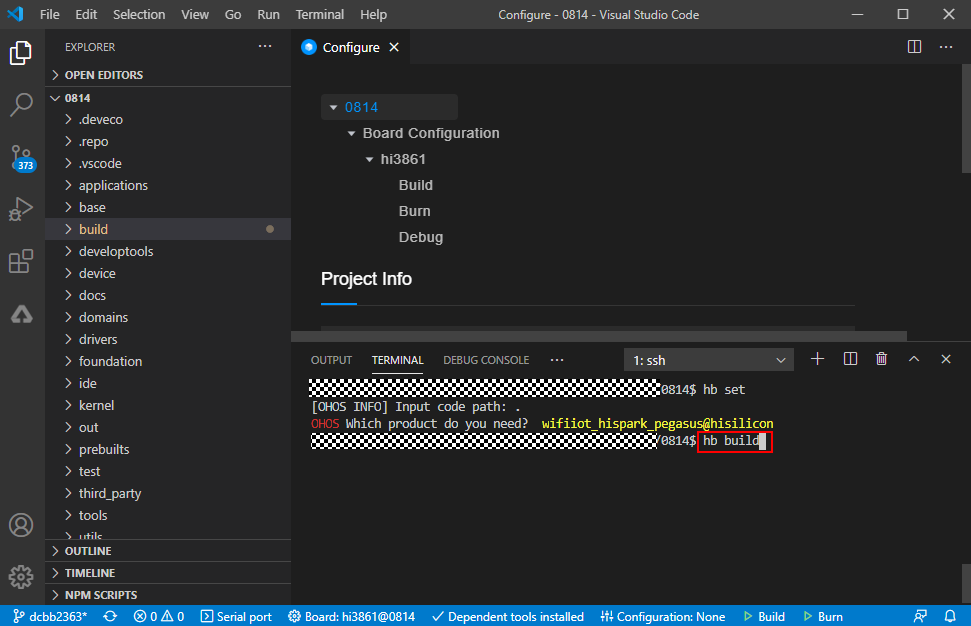
Go to the root directory of the code, run the hb set and . commands on TERMINAL page, and select the wifiiot_hispark_pegasus@hisilicon version.
Figure 3 Selecting the target build version
-
Run the hb build command to start building.
Figure 4 Running commands on TERMINAL page
-
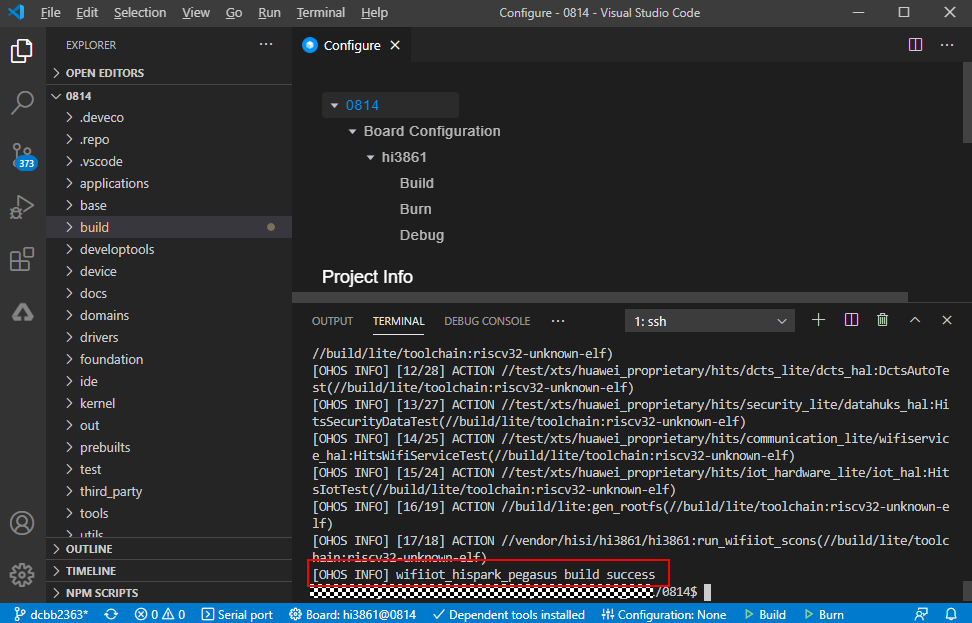
Check whether the building is successful. If yes, wifiiot_hispark_pegasus build success will be displayed, as shown in the following figure.
-
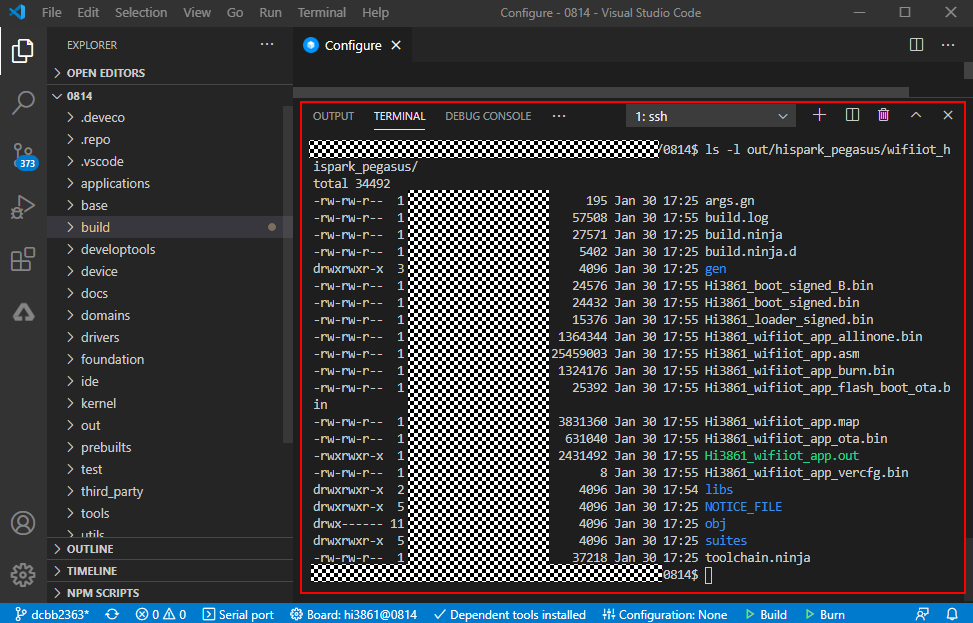
Check whether the following files are generated in the ./out/wifiiot/ directory.
ls -l out/hispark_pegasus/wifiiot_hispark_pegasus/Figure 6 Directory for storing the generated files
Burning Images
You can use the DevEco tool to perform the image burning of the Hi3861 WLAN module. For details about how to use the tool, see HUAWEI DevEco Device Tool User Guide.
-
Use a USB cable to connect the Windows workstation to the Hi3861 development board.
-
Download and install the USB-to-Serial port driver.
-
Query the COM port on the device manager, for example, CH340(COM11). The serial port integrates functions such as code burning, log printing, and AT commands execution.
-
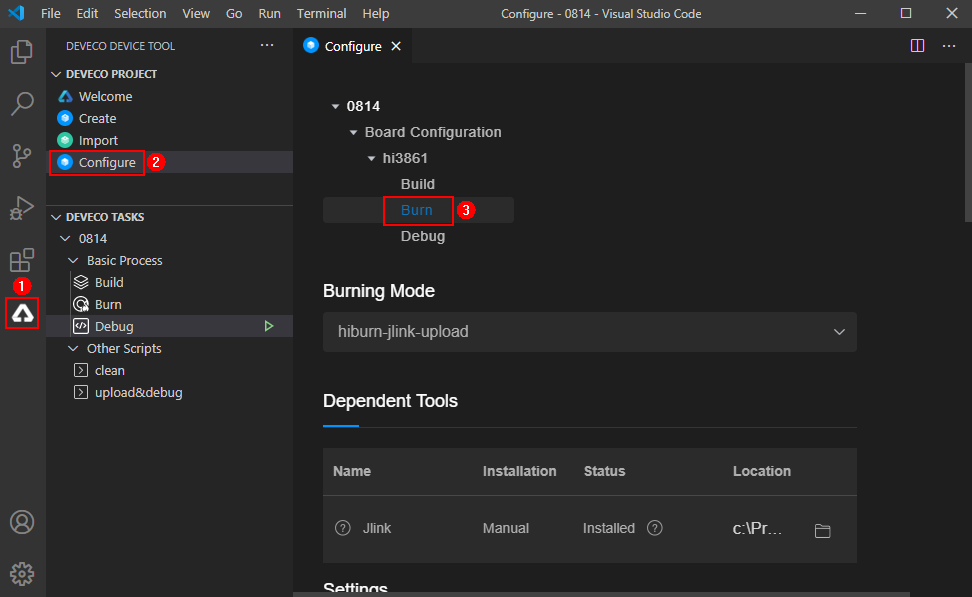
Enter the burning configuration page.
Figure 8 Basic configurations for image burning
-
Set basic parameters.
- Set a proper baud rate. A higher baud rate indicates a faster burning speed. Here the default value 921600 is recommended.
- Select a data bit. The default value of Data bit for the WLAN module is 8.
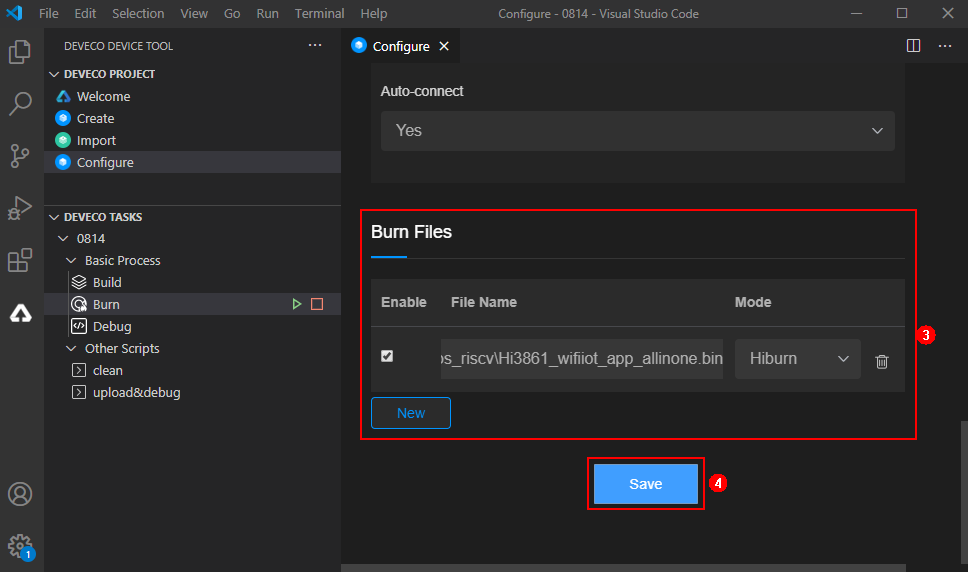
- Select the version package path ./out/wifiiot/Hi3861_wifiiot_app_allinone.bin and Hiburn mode.
- Click Save to save configurations.
Figure 9 Baud rate and data bit configurations

Figure 10 Path of the burning package
-
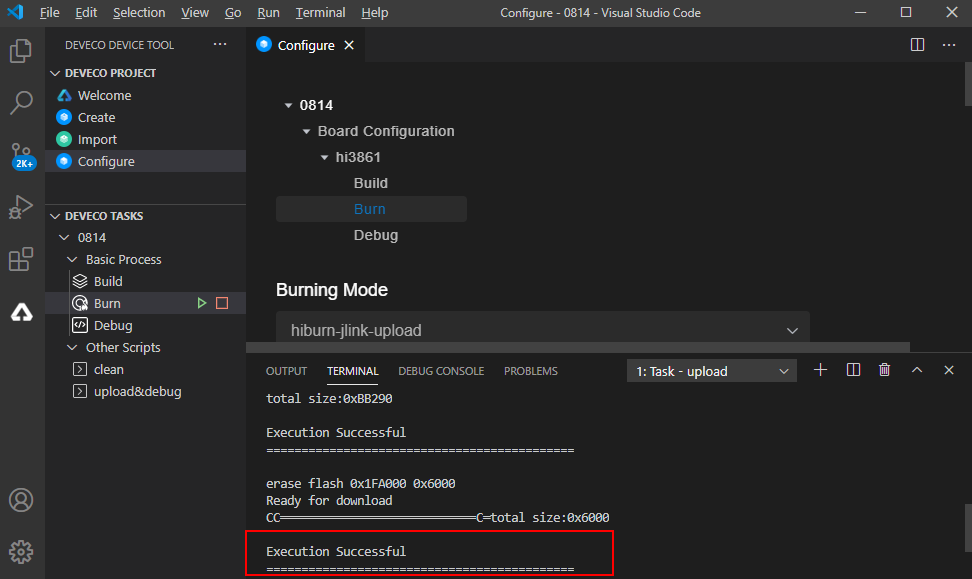
On the DevEco, click Burn
 and select the serial port COM11.
 -
After the serial port is selected, Connecting, please reset device... is shown below the TERMINAL tab, indicating that the module is in the to-be-burnt state.
-
Press the Reset key on the module to start burning. Execution Successful displayed below the TERMINAL tab indicates the burning is complete.


Connecting WLAN Module to the Internet
After completing version building and burning, do as follows to connect the WLAN module to the Internet using AT commands.
-
Keep Windows workstation connected to the WLAN module and click Serial port at the bottom of DevEco to view the configuration page.
-
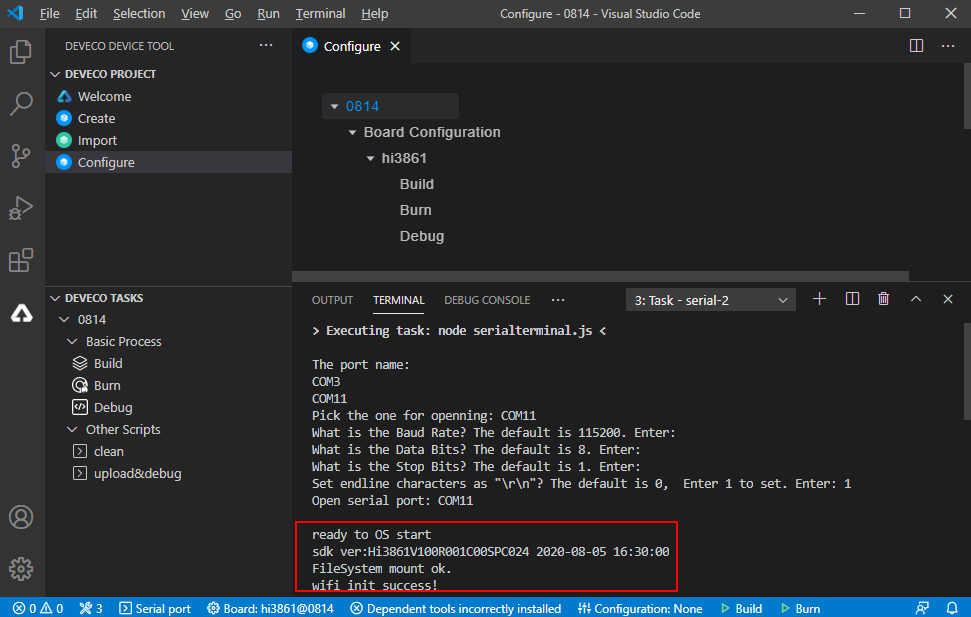
Select the serial port and set parameters. Enter the actual serial port number. Here the serial port number is COM11; the default values of Baud rate, Data bit, and Stop bit are used; 1 is used as the end-line character since a valid input AT command must end with \r\n.
-
Reset the WLAN module. The message ready to OS start is displayed on the terminal page, indicating that the WLAN module is started successfully.
Figure 16 Successful resetting of the WLAN module
-
Run the following AT commands in sequence via the DevEco serial port terminal to start the STA mode, connect to the specified AP, and enable Dynamic Host Configuration Protocol (DHCP).
AT+STARTSTA # Start the STA mode. AT+SCAN # Scan for available APs. AT+SCANRESULT # Display the scanning result. AT+CONN="SSID",,2,"PASSWORD" # Connect to the specified AP. (SSID and PASSWORD represent the name and password of the hotspot to be connected, respectively.) AT+STASTAT # View the connection result. AT+DHCP=wlan0,1 # Request the IP address of wlan0 from the AP using DHCP. -
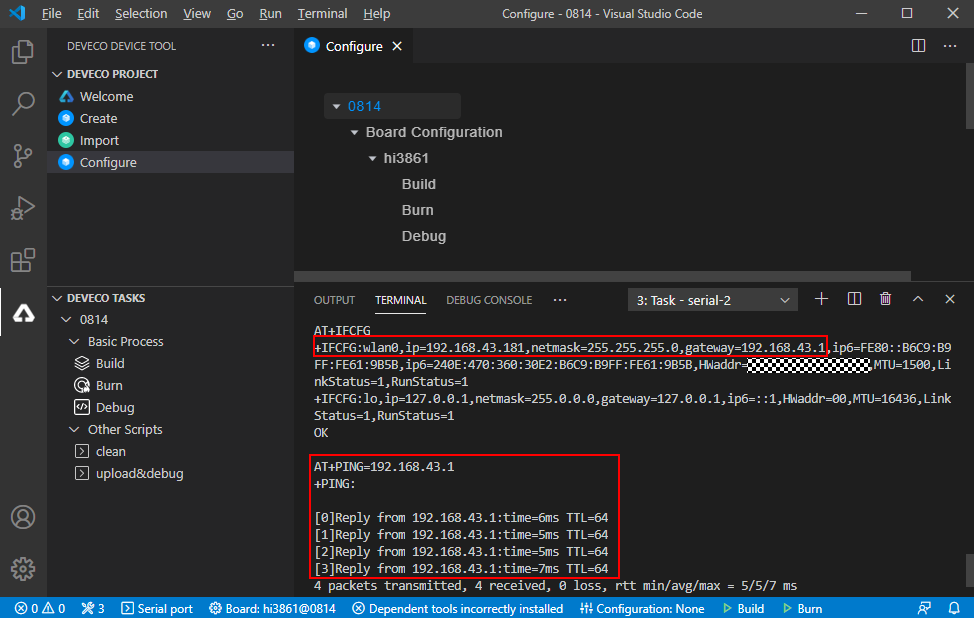
Check whether the WLAN module is properly connected to the gateway, as shown in the following figure.
AT+IFCFG                                # View the IP address assigned to an interface of the module.
AT+PING=X.X.X.X                         # Check the connectivity between the module and the gateway. Replace X.X.X.X with the actual gateway address.
Figure 17 Successful networking of the WLAN module