Burning
Hi3861 V100 supports burning through the serial port. To burn source code through the serial port in Windows, perform the following steps:
NOTE
In this document, the DevEco Device Tool 3.0 Release version is used as an example. The UI and usage of DevEco Device Tool vary by version. If you are using the latest version of DevEco Device Tool, perform instructions in Burning an Image.
-
Connect the computer and the target development board through the serial port and USB port. For details, see Introduction to the Hi3861 V100 Development Board.
-
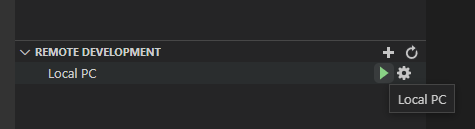
In DevEco Device Tool, choose REMOTE DEVELOPMENT > Local PC to check the connection status between the remote computer (Ubuntu development environment) and the local computer (Windows development environment).
- If
 is displayed on the right of Local PC, the remote computer is connected to the local computer. In this case, no further action is required.
 - If
 is displayed, click the connect icon.
 NOTE
NOTEThis operation is required only in remote access mode (in the Windows+Ubuntu hybrid development environment). If the local access mode (Windows or Ubuntu development environment) is used, skip this step.
- If
-
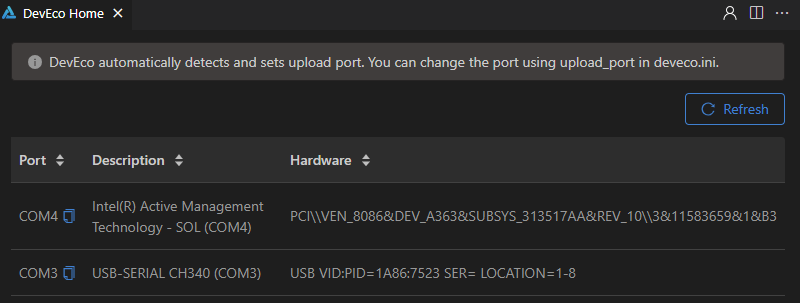
Check the serial port number in QUICK ACCESS > DevEco Home > Device in DevEco Device Tool.
 NOTE
NOTEIf the serial port number is not displayed correctly, follow the steps described in Installing the Serial Port Driver on Hi3861 V100.
-
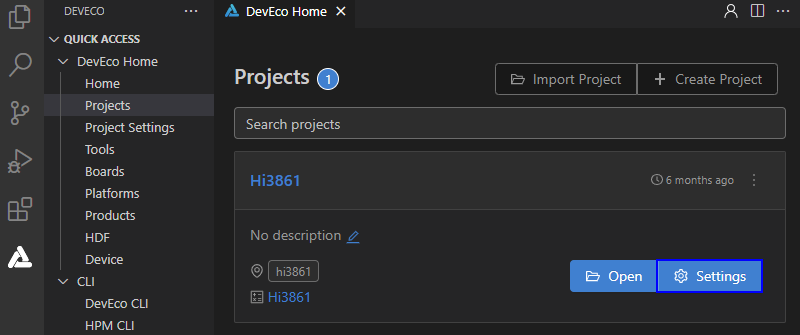
Choose QUICK ACCESS > DevEco Home > Projects, and then click Settings.
-
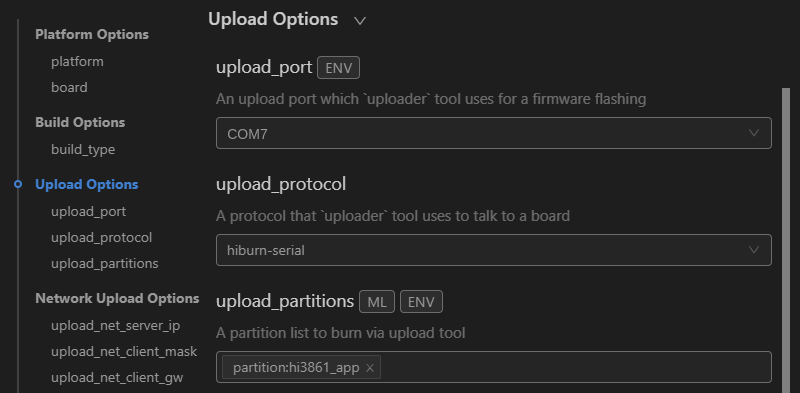
On the hi3861 tab page, set the burning options.
- upload_port: Select the serial port number obtained.
- upload_protocol: Select the burning protocol hiburn-serial.
- upload_partitions: Select the files to be burnt. hi3861_app is selected by default.
-
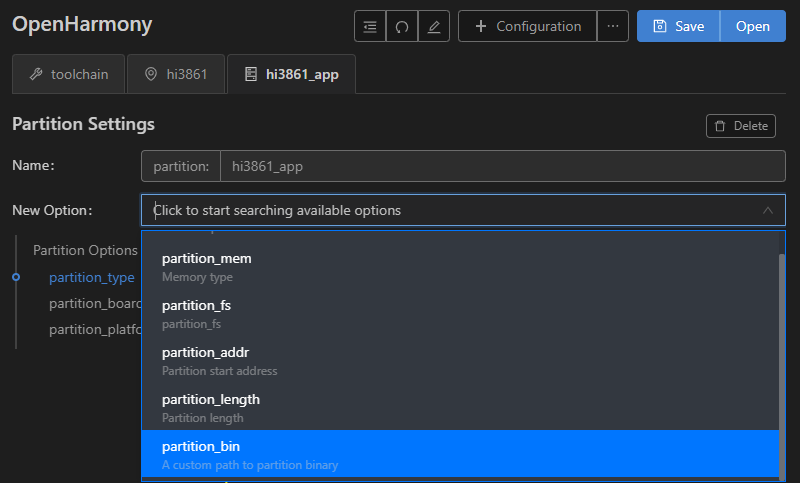
Check the preset information of the files to be burnt and modify them when necessary.
On the hi3861_app tab page, select partition_bin from New Option, and set the path of the file to be burnt.
-
When you finish modifying, click Save on the top.
-
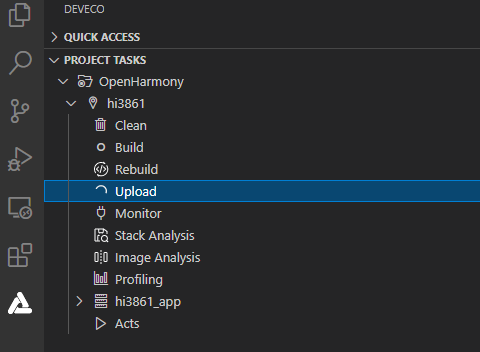
Click Open to open the project file. Then, choose PROJECT TASKS > hi3861 > Upload to start burning.
-
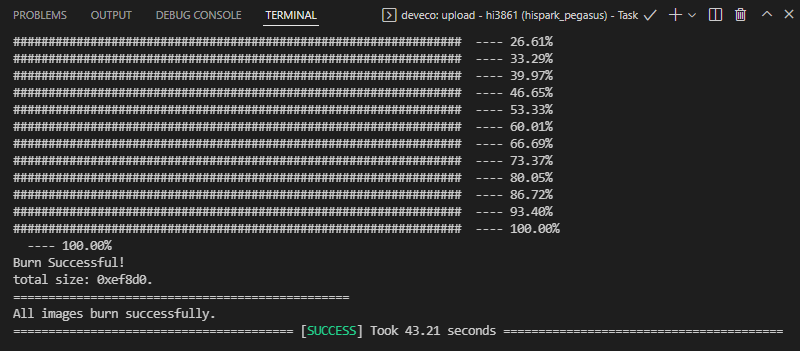
When the following information is displayed, press the RST button on the development board to restart it.

-
Wait until the burning is complete. When the following message is displayed, the burning is successful.