Setting Up Environments for the Mini and Small Systems
System Requirements
-
Windows: Windows 10 (64-bit)
-
Ubuntu: Ubuntu 18.04 or later; recommended memory: 16 GB or higher.
-
User name: cannot contain Chinese characters
-
DevEco Device Tool: 3.0 Release
Installing Necessary Libraries and Tools
To install the necessary libraries and tools, perform the following steps.
On Ubuntu:
-
Run the following apt-get command:
sudo apt-get update && sudo apt-get install binutils binutils-dev git git-lfs gnupg flex bison gperf build-essential zip curl zlib1g-dev gcc-multilib g++-multilib gcc-arm-linux-gnueabi libc6-dev-i386 libc6-dev-amd64 lib32ncurses5-dev x11proto-core-dev libx11-dev lib32z1-dev ccache libgl1-mesa-dev libxml2-utils xsltproc unzip m4 bc gnutls-bin python3.8 python3-pip ruby genext2fs device-tree-compiler make libffi-dev e2fsprogs pkg-config perl openssl libssl-dev libelf-dev libdwarf-dev u-boot-tools mtd-utils cpio doxygen liblz4-tool openjdk-8-jre gcc g++ texinfo dosfstools mtools default-jre default-jdk libncurses5 apt-utils wget scons python3.8-distutils tar rsync git-core libxml2-dev lib32z-dev grsync xxd libglib2.0-dev libpixman-1-dev kmod jfsutils reiserfsprogs xfsprogs squashfs-tools pcmciautils quota ppp libtinfo-dev libtinfo5 libncurses5-dev libncursesw5 libstdc++6 gcc-arm-none-eabi vim ssh locales NOTE
NOTE
The preceding command is applicable to Ubuntu 18.04. For other Ubuntu versions, modify the preceding installation command based on the installation package name. Specifically:-
Python 3.8 or a later version is required. This section uses Python 3.8 as an example.
-
Java 8 or later is required. This section uses Java 8 as an example.
-
-
Set Python 3.8 as the default Python version.
Check the location of Python 3.8:
which python3.8Change python and python3 to python3.8.
sudo update-alternatives --install /usr/bin/python python {python3.8 path} 1    #{Python3.8 path} is the location of Python 3.8 obtained in the previous step.
sudo update-alternatives --install /usr/bin/python3 python3 {python3.8 path} 1   #{Python3.8 path} is the location of Python 3.8 obtained in the previous step.
Installing DevEco Device Tool
To remotely access the Ubuntu environment through Windows to perform operations such as burning, you need to install DevEco Device Tool on both Windows and Ubuntu.
DevEco Device Tool is a one-stop integrated development environment (IDE) provided for developers of OpenHarmony-powered smart devices. It allows code editing, compiling, burning, and debugging. This document describes how to use DevEco Device Tool to remotely connect to the Ubuntu environment for burning and running.
Installing DevEco Device Tool for Windows
-
Download the DevEco Device Tool 3.0 Release Windows edition.
-
Decompress the DevEco Device Tool package, double-click the installer, and then click Next.
-
Set the installation path of DevEco Device Tool and click Next. You are advised to install DevEco Device Tool in a non-system drive.
NOTE
If you have installed DevEco Device Tool 3.0 Beta2 or earlier, the earlier version will be uninstalled before you install a new version. If the following error message is displayed during the uninstallation, click Ignore to continue the installation. This error does not affect the installation of the new version.

-
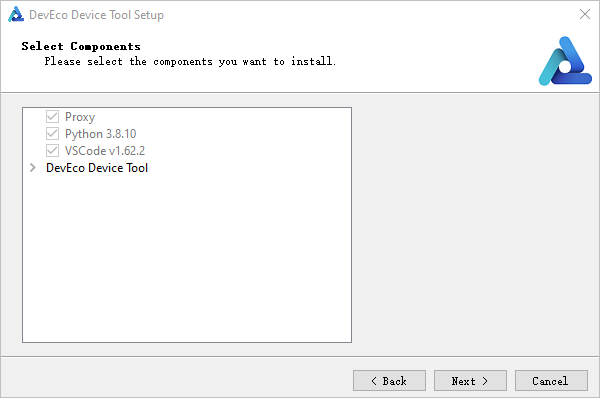
When prompted, select the tools to be automatically installed.
-
On the VSCode installation confirm page, select Install VScode 1.62.2 automatically and click Next.
NOTE
If Visual Studio Code 1.62 or later has been installed, this step will be skipped.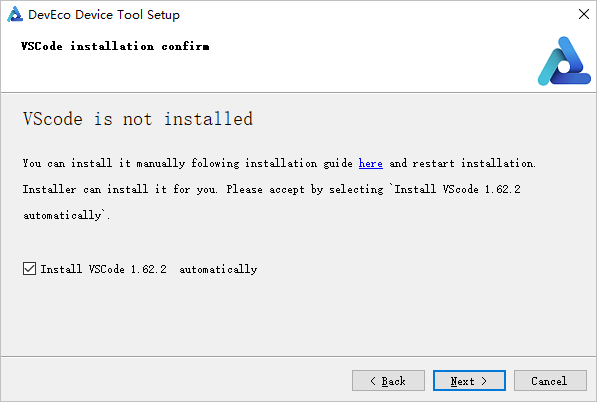
-
On the displayed Python select page, select Download from Huawei mirror and click Next.
NOTE
If Python 3.8 or 3.9 has been installed, select Use one of compatible on your PC.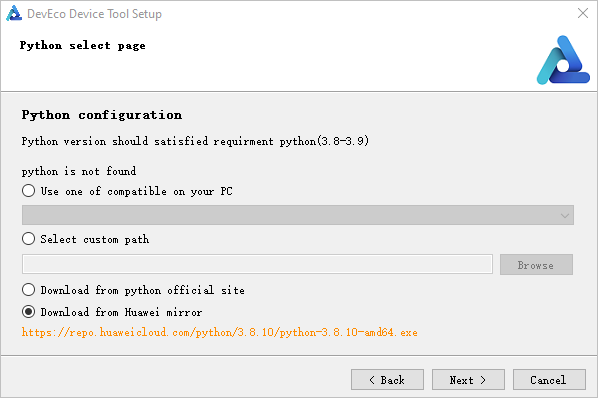
-
-
In the dialog box shown below, click Next to download and install the tools..
-
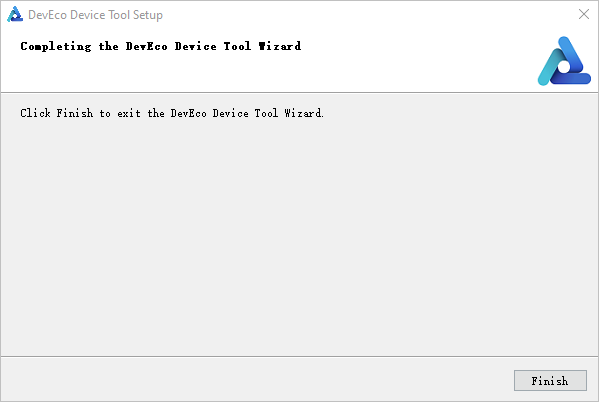
Wait for the DevEco Device Tool setup wizard to automatically install DevEco Device Tool. After the installation is complete, click Finish to close the setup wizard.
-
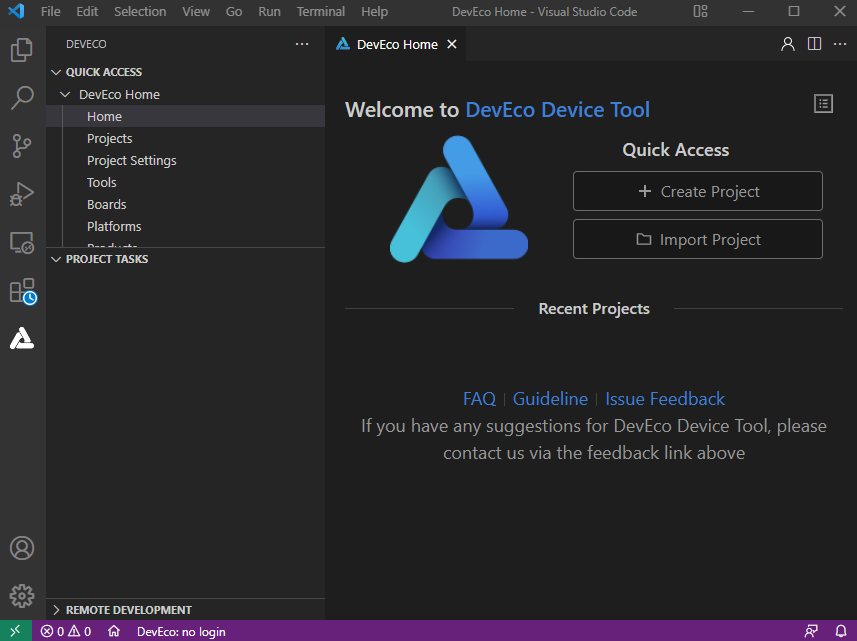
From Visual Studio Code, access the DevEco Device Tool page. Now you can conduct your development in DevEco Device Tool.
Installing DevEco Device Tool for Ubuntu
-
Make sure the Ubuntu shell environment is bash.
-
Run the following command and check whether the command output is bash. If the command output is not bash, go to step 2.
ls -l /bin/sh
-
Start the command-line tool, run the following command, enter your password, and select No to set Ubuntu shell to bash.
sudo dpkg-reconfigure dash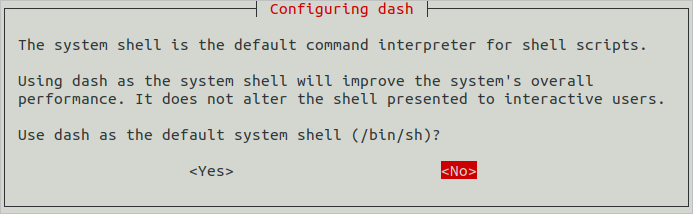
-
-
Download the DevEco Device Tool 3.0 Release Linux version.
-
Decompress the DevEco Device Tool software package and assign permission on the folder obtained from the decompression.
-
Go to the directory where the DevEco Device Tool software package is stored and run the following command to decompress the software package. In the command, change devicetool-linux-tool-3.0.0.401.zip to the actual software package name.
unzip devicetool-linux-tool-3.0.0.401.zip -
Open the folder of the decompressed software package and run the following command to grant the execute permission on the installation file. In the command, change devicetool-linux-tool-3.0.0.401.sh to the actual installation file name.
chmod u+x devicetool-linux-tool-3.0.0.401.sh
-
-
Run the following command to install DevEco Device Tool, where devicetool-linux-tool-3.0.0.401.sh indicates the installation file name.
NOTE
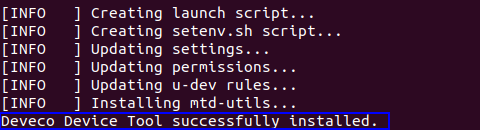
During the installation, the setup wizard automatically checks whether Python 3.8 or 3.9 is installed. If Python 3.8 or 3.9 is not installed, the setup wizard displays the "Do you want to continue?" message; enter Y to allow the setup wizard to automatically install Python.sudo ./devicetool-linux-tool-3.0.0.401.shWait until the "Deveco Device Tool successfully installed." message is displayed.
Configuring Windows to Remotely Access the Ubuntu Development Environment
Installing the SSH Service and Obtaining the IP Address for Remote Access
-
In Ubuntu, open the Terminal tool and run the following command to install the SSH service:
NOTE
If the command fails to be executed and the system displays a message indicating that the openssh-server and openssh-client depend on different versions, install the openssh-client of the required version (for example, sudo apt-get install openssh-client=1:8.2p1-4) as prompted on the command-line interface (CLI) and run the command again to install the openssh-server.sudo apt-get install openssh-server -
Run the following command to start the SSH service:
sudo systemctl start ssh -
Run the following command to obtain the IP address of the current user for remote access to the Ubuntu environment from Windows:
ifconfig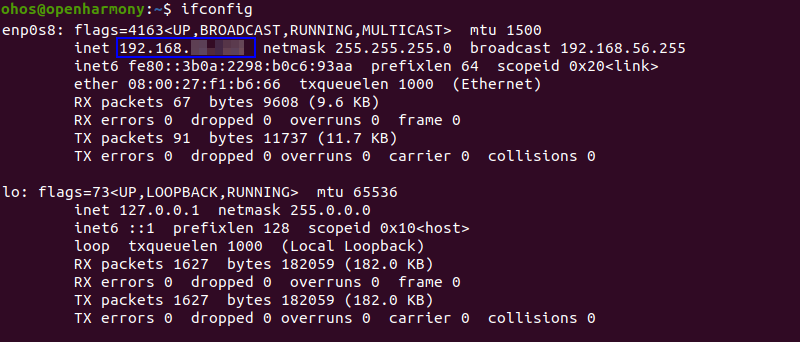
Installing Remote SSH
-
Open Visual Studio Code in Windows, click
 , and search for remote-ssh in the Extension Marketplace.
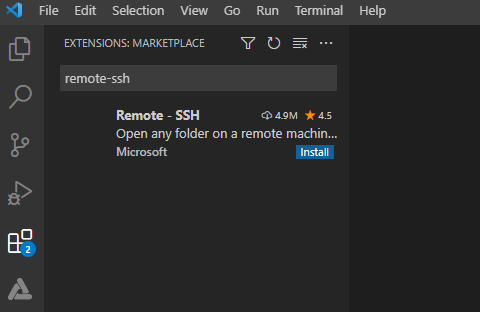
-
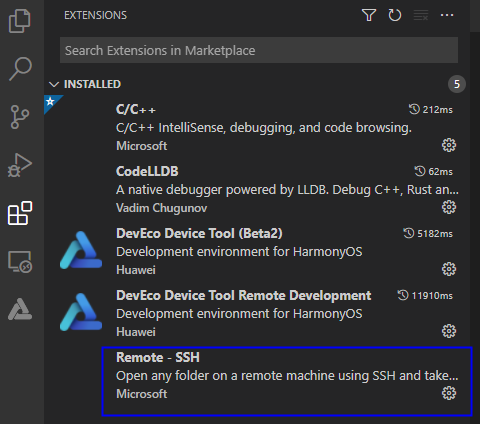
Click Install to install Remote-SSH. After the installation is successful, Remote-SSH is displayed on the INSTALLED list.
Remotely Connecting to the Ubuntu Environment
-
Open Visual Studio Code in Windows, click
 , and click + on the REMOTE EXOPLORER page.
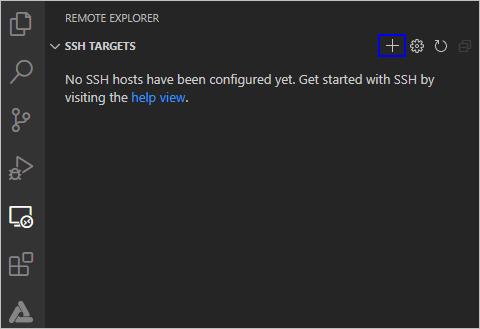
-
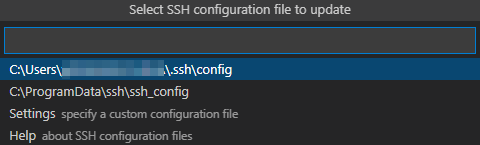
In the Enter SSH Connection Command text box, enter ssh username@ip_address, where ip_address indicates the IP address of the remote computer to be connected and username indicates the account name used for logging in to the remote computer.

-
In the displayed dialog box, select the default first option as the SSH configuration file.
-
Under SSH TARGETS, find the remote computer and click
 to start it.
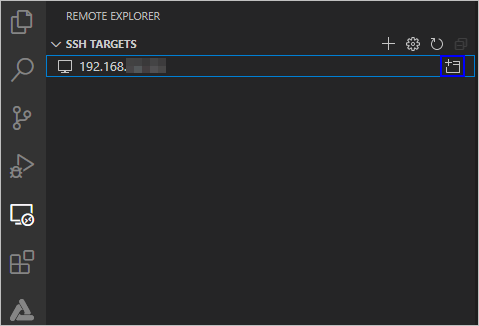
-
In the displayed dialog box, select Linux, select Continue, and enter the password for logging in to the remote computer.

After the connection is successful, the plug-in is automatically installed in the .vscode-server folder on the remote computer. After the installation is complete, reload Visual Studio Code in Windows as prompted. Then you can develop, compile, and burn source code in DevEco Device Tool on Windows.
Registering the Public Key for Accessing the Ubuntu Environment
After the preceding operations are complete, you can remotely connect to the Ubuntu environment through Windows for development. However, you need to frequently enter the remote connection password. To eliminate this need, you can use the SSH public key.
-
Open the Git bash CLI and run the following command to generate an SSH public key. During command execution, perform operations as prompted. Set username and ip to the user name and IP address you use for connecting to the Ubuntu system.
ssh-keygen -t rsa
ssh-copy-id -i ~/.ssh/id_rsa.pub username@ip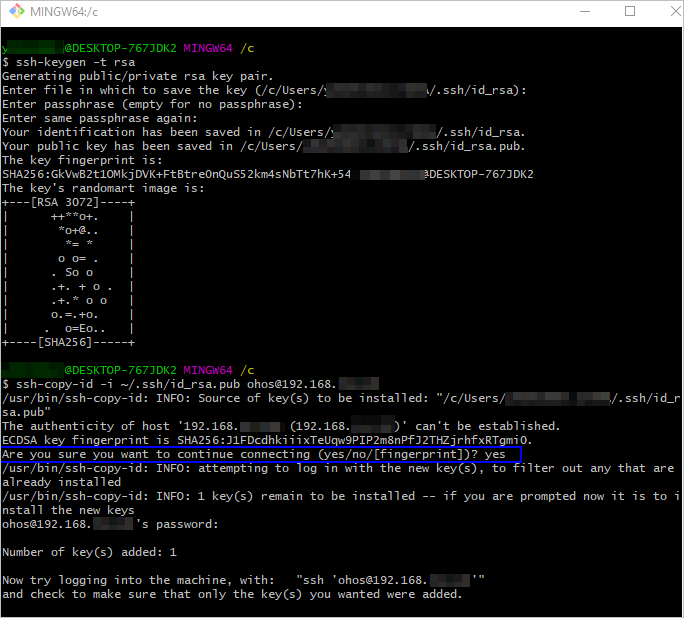
-
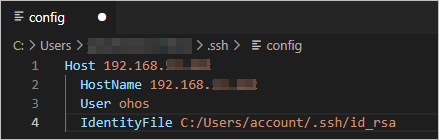
In Visual Studio Code, click the remote connection setting button and open the config file.

-
In the config file, add the SSK key file information, as shown below. Then save the file.
Obtaining Source Code
In the Ubuntu environment, perform the following steps to obtain the OpenHarmony source code:
Preparations
-
Register your account with Gitee.
-
Register an SSH public key for access to Gitee.
-
Install the git client and git-lfs. (Skip this step if these tools have been installed in Installing Required Libraries and Tools. )
Update the software source:
sudo apt-get updateRun the following command to install the tools:
sudo apt-get install git git-lfs -
Configure user information.
git config --global user.name "yourname" git config --global user.email "your-email-address" git config --global credential.helper store -
Run the following commands to install the repo tool:
curl https://gitee.com/oschina/repo/raw/fork_flow/repo-py3 -o /usr/local/bin/repo  # If you do not have the access permission to this directory, download the tool to any other accessible directory and configure the directory to the environment variable.
chmod a+x /usr/local/bin/repo
pip3 install -i https://repo.huaweicloud.com/repository/pypi/simple requests
Obtaining Source Code
Download the master code if you want to get quick access to the latest features for your development. Download the release code, which is more stable, if you want to develop commercial functionalities.
-
Obtaining OpenHarmony master code
Method 1 (recommended): Use the repo tool to download the source code over SSH. (You must have registered an SSH public key for access to Gitee.)
repo init -u git@gitee.com:openharmony/manifest.git -b master --no-repo-verify
repo sync -c
repo forall -c 'git lfs pull'
Method 2: Use the repo tool to download the source code over HTTPS.
repo init -u https://gitee.com/openharmony/manifest.git -b master --no-repo-verify repo sync -c repo forall -c 'git lfs pull' -
Obtaining OpenHarmony release code
For details about how to obtain the source code of an OpenHarmony release, see the Release-Notes.
Running prebuilts
Go to the root directory of the source code and run the following script to install the compiler and binary tool:
bash build/prebuilts_download.sh
Installing the Compilation Tool
For details about the functions of the OpenHarmony compilation and building module, see Compilation and Building Guidelines.
Perform the following steps in Ubuntu:
Install hb.
To install a proxy, see Configuring the Proxy.
-
Run the following command to install hb and update it to the latest version:
pip3 install --user build/lite -
Set the environment variable.
vim ~/.bashrcCopy the following command to the last line of the .bashrc file, save the file, and exit.
export PATH=~/.local/bin:$PATHUpdate the environment variable.
source ~/.bashrc -
Run the hb -h command in the source code directory. If the following information is displayed, the installation is successful:
usage: hb

OHOS build system

positional arguments:
  {build,set,env,clean}
    build               Build source code
    set                 OHOS build settings
    env                 Show OHOS build env
    clean               Clean output

optional arguments:
  -h, --help            show this help message and exit
NOTICE
Run the following command to uninstall hb:
pip3 uninstall ohos-buildIf any issue occurs during the hb installation, see FAQs to troubleshoot.
Install LLVM. This step is only required for OpenHarmony_v1.x.
When downloading source code under the OpenHarmony_v1.x branches or tags, perform the operation procedure described in this section to install LLVM 9.0.0.When downloading source code under the Master or non-OpenHarmony_v1.x branches or tags, skip this section. hb will automatically download the latest version of LLVM.
-
Start a Linux server.
-
Decompress the LLVM installation package to ~/llvm.
tar -zxvf llvm.tar -C ~/ -
Set the environment variable.
vim ~/.bashrcCopy the following command to the last line of the .bashrc file, save the file, and exit.
export PATH=~/llvm/bin:$PATH -
Validate the environment variable.
source ~/.bashrc