<input> Development
The <input> component provides an interactive way to receive user input of various types, including date, checkbox, and button. For details, see input.
Creating an <input> Component
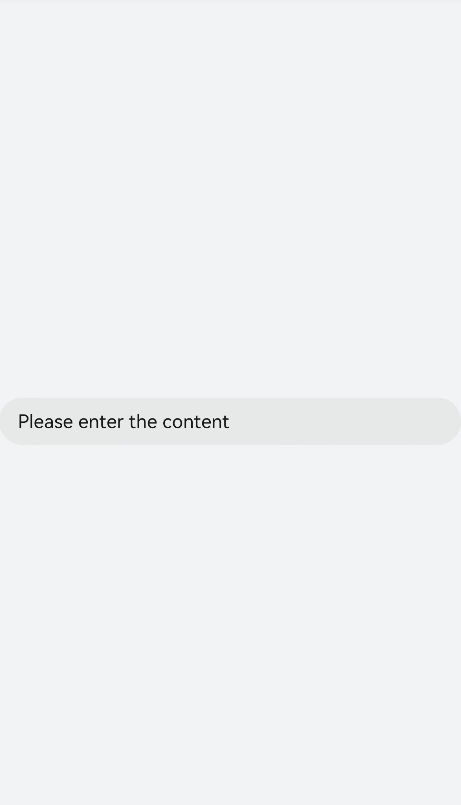
Create an <input> component in the .hml file under pages/index.
<!-- xxx.hml -->
<div class="container">
  <input type="text">
     Please enter the content
  </input>
</div>
/* xxx.css */
.container {
  width: 100%;
  height: 100%;
  flex-direction: column;
  justify-content: center;
  align-items: center;
  background-color: #F1F3F5;
}
Setting the Input Type
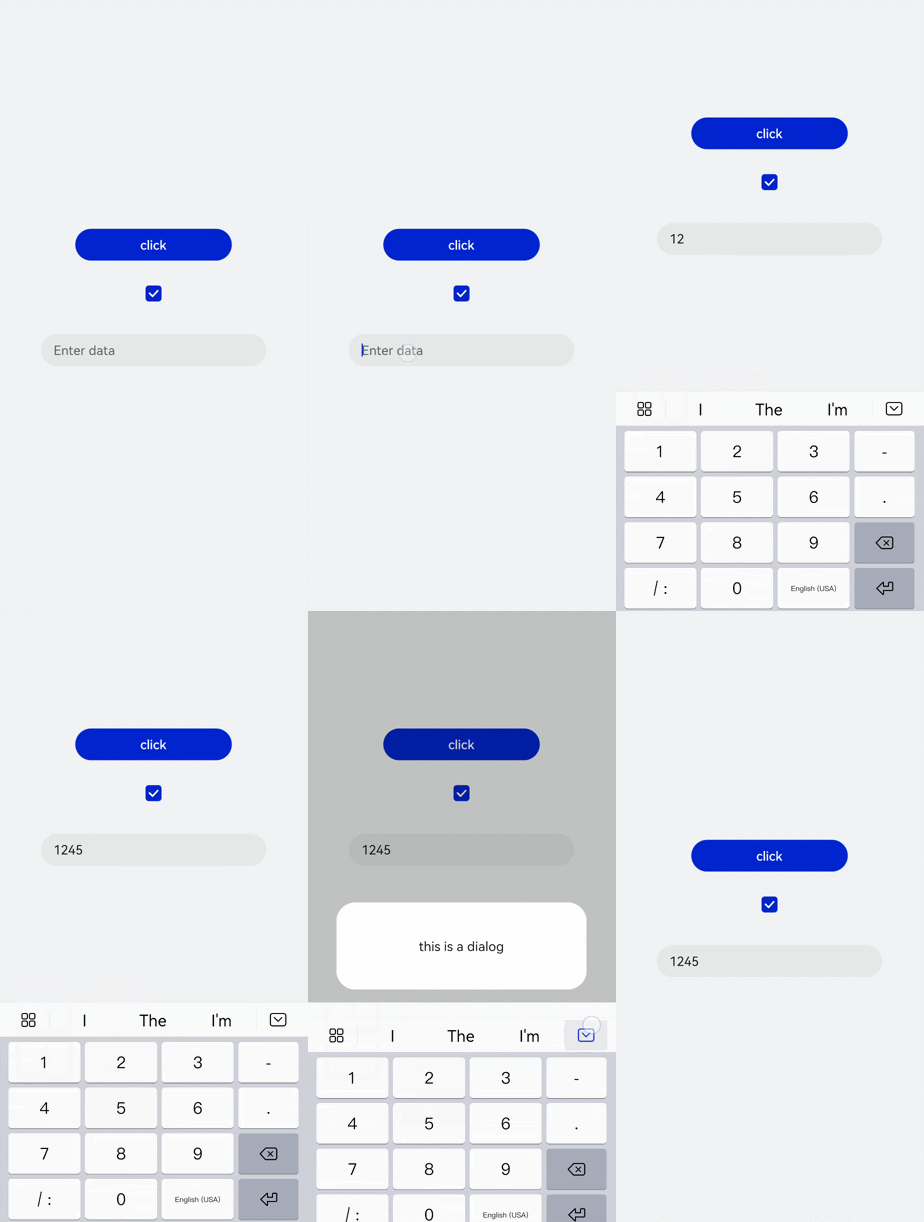
Set the type attribute of the <input> component to button, date, or any of the supported values.
<!-- xxx.hml -->
<div class="container">
  <div class="div-button">
    <dialog class="dialogClass" id="dialogId">
      <div class="content">
        <text>this is a dialog</text>
      </div>
    </dialog>
    <input class="button" type="button" value="click" onclick="btnclick"></input>
  </div>
  <div class="content">
    <input onchange="checkboxOnChange" checked="true" type="checkbox"></input>
  </div>
  <div class="content">
    <input type="date" class="flex" placeholder="Enter data"></input>
  </div>
</div>
/* xxx.css */
.container {
  width: 100%;
  height: 100%;
  align-items: center;
  flex-direction: column;
  justify-content: center;
  background-color: #F1F3F5 ;
}
.div-button {
  flex-direction: column;
  align-items: center;
}
.dialogClass{
  width:80%;
  height: 200px;
}
.button {
  margin-top: 30px;
  width: 50%;
}
.content{
  width: 90%;
  height: 150px;
  align-items: center;
  justify-content: center;
}
.flex {
  width: 80%;
  margin-bottom:40px;
}
// xxx.js
export default {
  btnclick(){
    this.$element('dialogId').show()
  },
}
NOTE
For wearables, the input type can only be button, radio, or checkbox.
The settings of checked take effect only when the input type is set to checkbox or radio. The default value of checked is false.
Event Binding
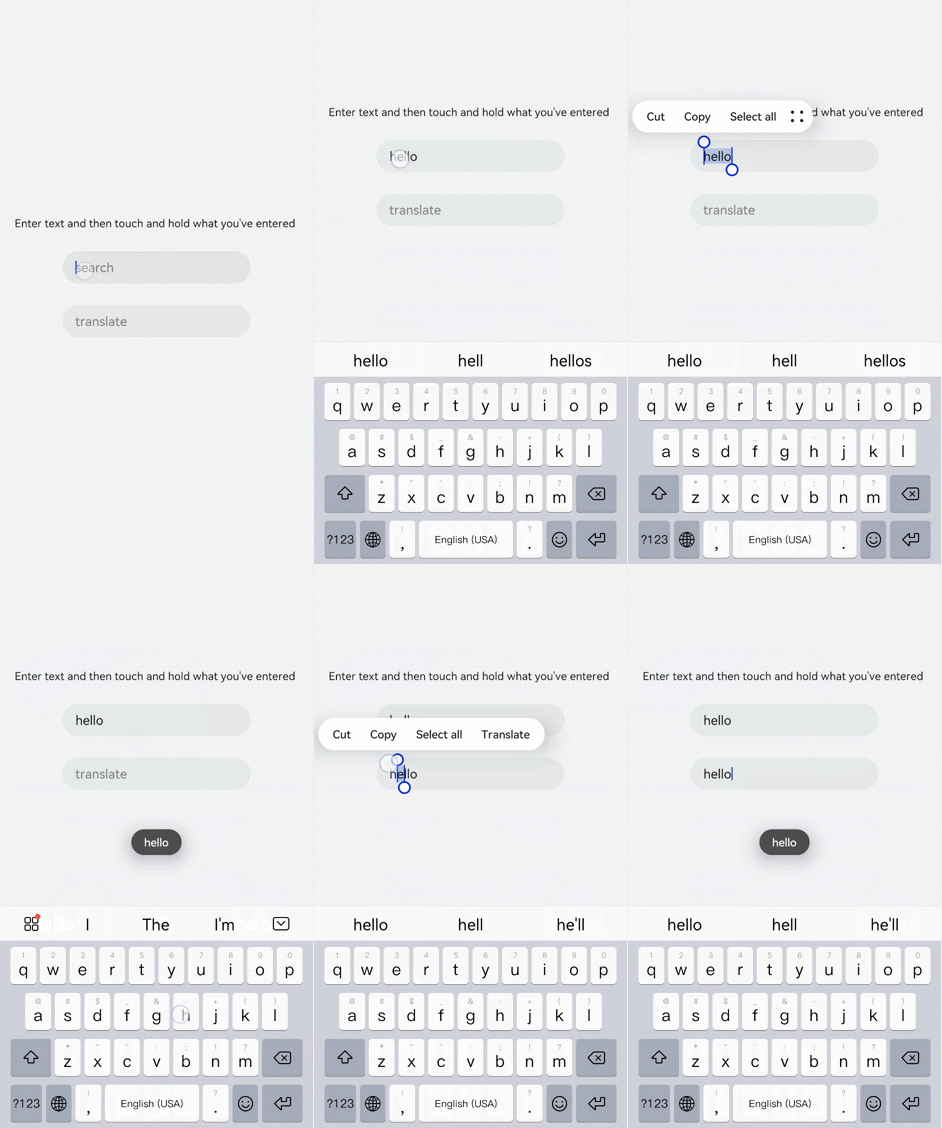
Add the search and translate events to the <input> component.
<!-- xxx.hml -->
<div class="content">
  <text style="margin-left: -7px;">
    <span>Enter text and then touch and hold what you've entered</span>
  </text>
  <input class="input" type="text" onsearch="search" placeholder="search"> </input>
  <input class="input" type="text" ontranslate="translate" placeholder="translate"> </input>
</div>
/* xxx.css */
.content {
  width: 100%;
  height: 100%;
  flex-direction: column;
  align-items: center;
  justify-content: center;
  background-color: #F1F3F5;
}
.input {
  margin-top: 50px;
  width: 60%;
  placeholder-color: gray;
}
text{
  width:100%;
  font-size:25px;
  text-align:center;
}
// xxx.js
import promptAction from '@ohos.promptAction'
export default {
  search(e){
    promptAction.showToast({
      message:  e.value,
      duration: 3000,
    });
  },
  translate(e){
    promptAction.showToast({
      message:  e.value,
      duration: 3000,
    });
  }
}
Setting the Input Error Message
Add the showError method to the <input> component to display an error message in the event of incorrect input.
<!-- xxx.hml -->
<div class="content">
  <input id="input" class="input" type="text"  maxlength="20" placeholder="Please input text" onchange="change">
  </input>
  <input class="button" type="button" value="Submit" onclick="buttonClick"></input>
</div>
/* xxx.css */
.content {
  width: 100%;
  height: 100%;
  flex-direction: column;
  align-items: center;
  justify-content: center;
  background-color: #F1F3F5;
}
.input {
  width: 80%;
  placeholder-color: gray;
}
.button {
  width: 30%;
  margin-top: 50px;
}
// xxx.js
import promptAction from '@ohos.promptAction'
 export default {
   data:{
     value:'',
   },
   change(e){
     this.value = e.value;
     promptAction.showToast({
     message: "value: " + this.value,
       duration: 3000,
      });
   },
   buttonClick(e){
     if(this.value.length > 6){
       this.$element("input").showError({
         error:  'Up to 6 characters are allowed.'
       });
      }else if(this.value.length == 0){
        this.$element("input").showError({
          error:this.value + 'This field cannot be left empty.'
        });
      }else{
        promptAction.showToast({
          message: "success "
        });
      }
   },
 }
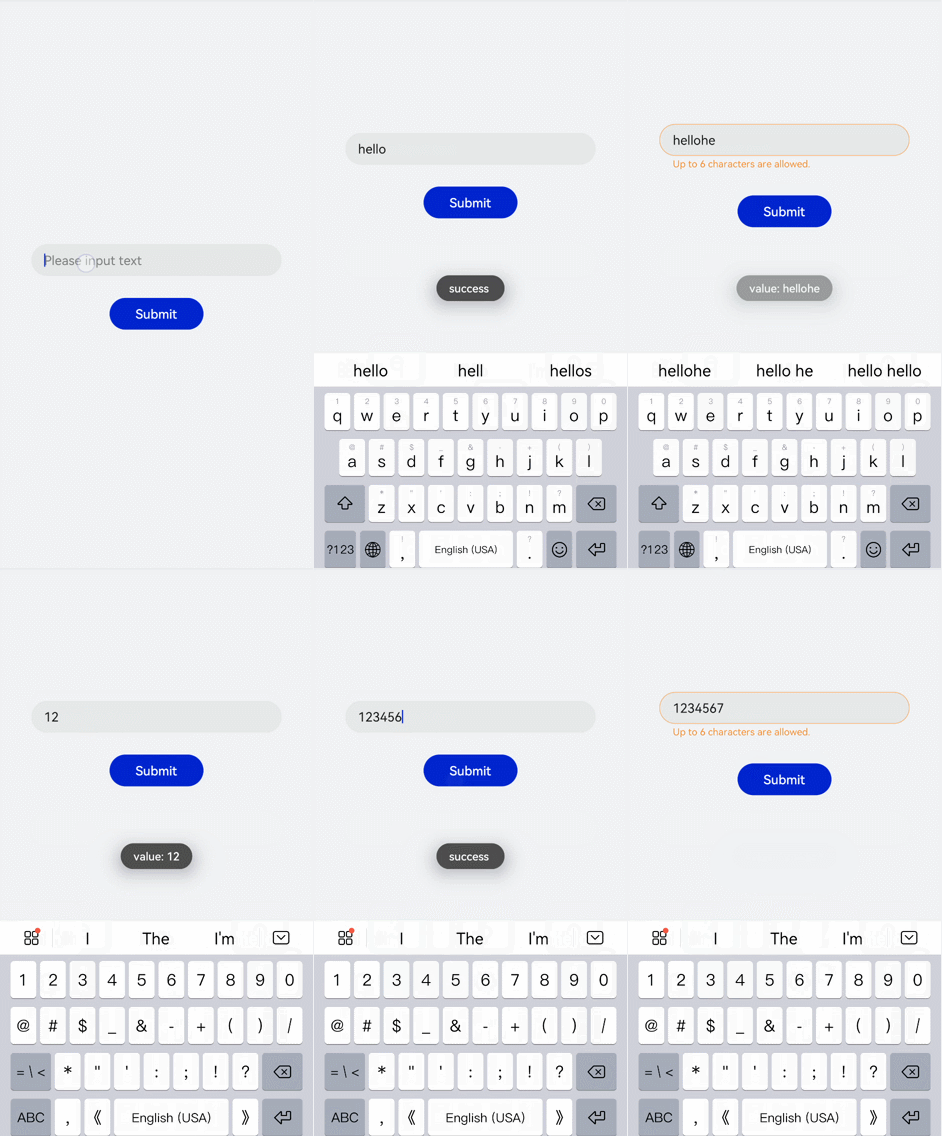
NOTE
This method is available when the input type is set to text, email, date, time, number, or password.
Example Scenario
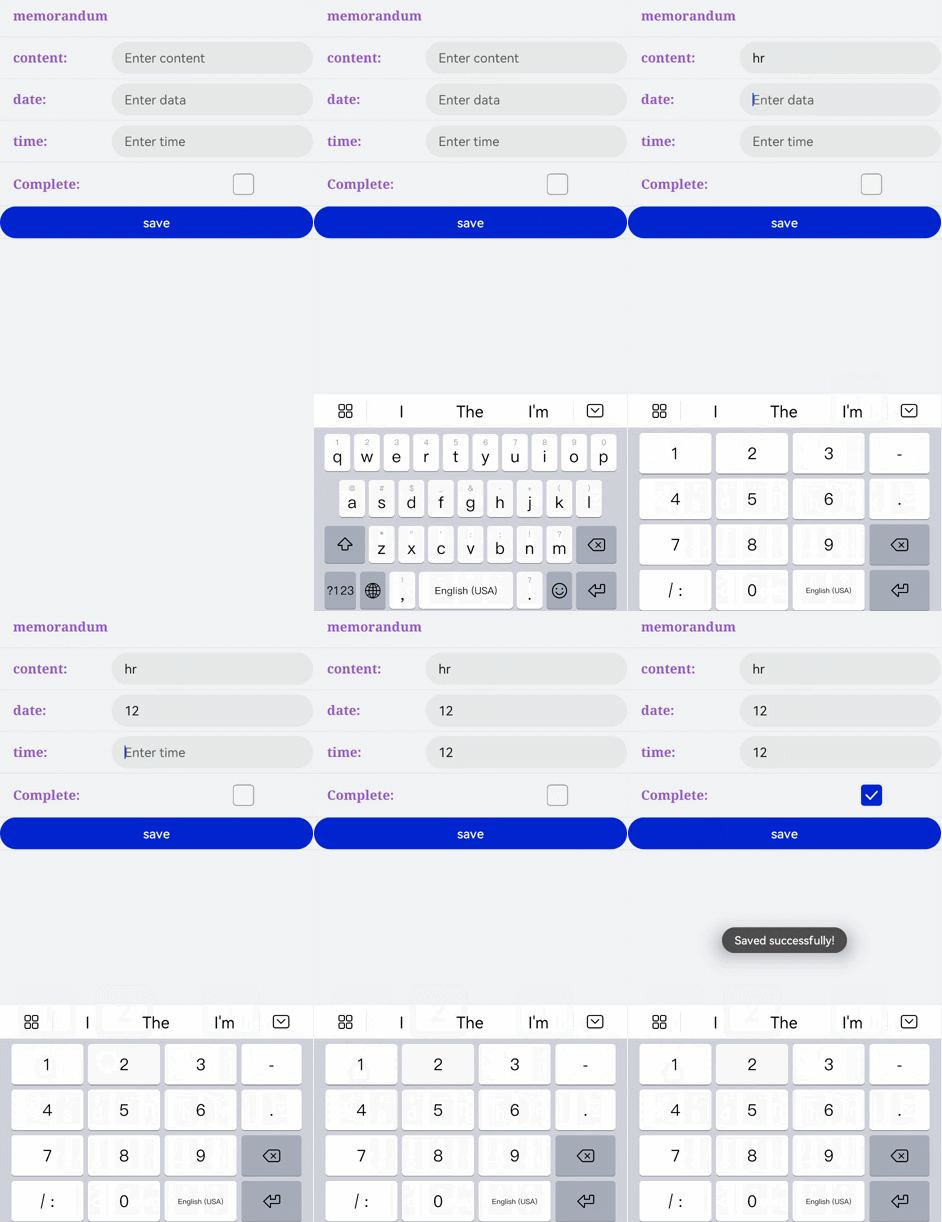
Enter information by using the <input> component of the type that suits your needs.
<!-- xxx.hml -->
<div class="container">
  <div class="label-item">
    <label>memorandum</label>
  </div>
  <div class="label-item">
    <label class="lab" target="input1">content:</label>
    <input class="flex" id="input1" placeholder="Enter content" />
  </div>
  <div class="label-item">
    <label class="lab" target="input3">date:</label>
    <input class="flex" id="input3" type="date" placeholder="Enter data" />
  </div>
  <div class="label-item">
    <label class="lab" target="input4">time:</label>
    <input class="flex" id="input4" type="time" placeholder="Enter time" />
  </div>
  <div class="label-item">
    <label class="lab" target="checkbox1">Complete:</label>
    <input class="flex" type="checkbox" id="checkbox1" style="width: 100px;height: 100px;" />
  </div>
  <div class="label-item">
    <input class="flex" type="button" id="button" value="save" onclick="btnclick"/>
  </div>
</div>
/* xxx.css */
.container {
  flex-direction: column;
  background-color: #F1F3F5;
}
.label-item {
  align-items: center;
  border-bottom-width: 1px;border-color: #dddddd;
}
.lab {
  width: 400px;}
label {
  padding: 30px;
  font-size: 30px;
  width: 320px;
  font-family: serif;
  color: #9370d8;
  font-weight: bold;
}
.flex {
  flex: 1;
}
.textareaPadding {
  padding-left: 100px;
}
// xxx.js
import promptAction from '@ohos.promptAction';
export default {
  data: {
  },
  onInit() {
  },
  btnclick(e) {
    promptAction.showToast({
      message:'Saved successfully!'
    })
  }
}
