Page Routing (@ohos.router)
Page routing refers to the redirection and data transfer between different pages in an application. It can be implemented through APIs of the Router module. Through different URLs, you can easily navigate users through pages. This document describes the functions provided by the Router module from the following aspects: Page Redirection, Page Return, Adding a Confirmation Dialog Box Before Page Return, and Named Route.
The Router module is applicable to page redirection between modules and within a module. It uses page URLs to decouple modules. Regarding page redirection within a module, prefer Navigation over this module to create better transition effects.
Page Redirection
Page redirection is an important part of the development process. When using an application, you usually need to jump between different pages, and sometimes you need to pass data from one page to another.
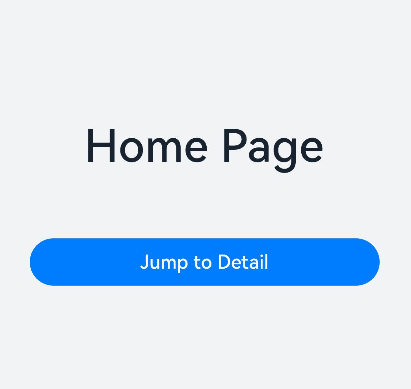
Figure 1 Page redirection

The Router module provides two redirection modes: router.pushUrl() and router.replaceUrl(). Whether the target page will replace the current page depends on the mode used.
-
router.pushUrl(): The target page is pushed into the page stack and does not replace the current page. In this mode, the state of the current page is retained, and users can return to the current page by pressing the back button or calling the router.back() API.
-
router.replaceUrl(): The target page replaces and destroys the current page. In this mode, the resources of the current page can be released, and users cannot return to the current page.
NOTE
When creating a page, configure the route to this page by following instructions in Building the Second Page.
The maximum capacity of a page stack is 32 pages. If this limit is exceeded, the router.clear() API can be called to clear the historical page stack and free the memory.
The Router module also provides two instance modes: Standard and Single. Depending on the mode, the target URL is mapped to one or more instances.
-
Standard: multi-instance mode. It is the default instance mode. In this mode, the target page is added to the top of the page stack, regardless of whether a page with the same URL exists in the stack.
-
Single: singleton mode. In this mode, if the URL of the target page already exists in the page stack, the page closest to the top of the stack with the same URL is moved to the top of the stack and becomes the new page. If the URL of the target page does not exist in the page stack, the page is redirected in standard mode.
Before using the Router module, import it first.
import router from '@ohos.router';
import { BusinessError } from '@ohos.base';
import promptAction from '@ohos.promptAction';
-
Scenario 1: There is a home page (Home) and a details page (Detail). You want to click an offering on the home page to go to the details page. In addition, the home page needs to be retained in the page stack so that the status can be restored when the page is returned. In this scenario, you can use the pushUrl() API and use the Standard instance mode (which can also be omitted).
import router from '@ohos.router';
// On the Home page
function onJumpClick(): void {
  router.pushUrl({
    url: 'pages/Detail' // Target URL.
  }, router.RouterMode.Standard, (err) => {
    if (err) {
      console.error(`Invoke pushUrl failed, code is ${err.code}, message is ${err.message}`);
      return;
    }
    console.info('Invoke pushUrl succeeded.');
  });
}
NOTE
In standard (multi-instance) mode, the router.RouterMode.Standard parameter can be omitted.
-
Scenario 2: There is a login page (Login) and a personal center page (Profile). After a user successfully logs in from the Login page, the Profile page is displayed. At the same time, the Login page is destroyed, and the application exits when the back button is pressed. In this scenario, you can use the replaceUrl() API and use the Standard instance mode (which can also be omitted).
import router from '@ohos.router';
// On the Login page
function onJumpClick(): void {
  router.replaceUrl({
    url: 'pages/Profile' // Target URL.
  }, router.RouterMode.Standard, (err) => {
    if (err) {
      console.error(`Invoke replaceUrl failed, code is ${err.code}, message is ${err.message}`);
      return;
    }
    console.info('Invoke replaceUrl succeeded.');
  })
}
NOTE
In standard (multi-instance) mode, the router.RouterMode.Standard parameter can be omitted.
-
Scenario 3: There is a Setting page and a Theme page. After a theme option on the Setting page is clicked, the Theme page is displayed. Only one Theme page exists in the page stack at the same time. When the back button is clicked on the Theme page, the Setting page is displayed. In this scenario, you can use the pushUrl() API and use the Single instance mode.
import router from '@ohos.router'; // On the Setting page function onJumpClick(): void { router.pushUrl({ url: 'pages/Theme' // Target URL. }, router.RouterMode.Single, (err) => { if (err) { console.error(`Invoke pushUrl failed, code is ${err.code}, message is ${err.message}`); return; } console.info('Invoke pushUrl succeeded.'); }); } -
Scenario 4: There is a search result list page (SearchResult) and a search result details page (SearchDetail). You want to click a result on the SearchResult page to go to the SearchDetail page. In addition, if the result has been viewed before, clicking the result displays the existing details page, instead of creating a new one. In this scenario, you can use the replaceUrl() API and use the Single instance mode.
import router from '@ohos.router';

// On the SearchResult page
function onJumpClick(): void {
  router.replaceUrl({
    url: 'pages/SearchDetail' // Target URL.
  }, router.RouterMode.Single, (err) => {
    if (err) {
      console.error(`Invoke replaceUrl failed, code is ${err.code}, message is ${err.message}`);
      return;
    }
    console.info('Invoke replaceUrl succeeded.');
  })
}
The preceding scenarios do not involve parameter transfer.
If you need to transfer data to the target page during redirection, you can add a params attribute and specify an object as a parameter when invoking an API of the Router module. Example:
import router from '@ohos.router';
class DataModelInfo {
  age: number = 0;
}

class DataModel {
  id: number = 0;
  info: DataModelInfo|null = null;
}

function onJumpClick(): void {
  // On the Home page
  let paramsInfo: DataModel = {
    id: 123,
    info: {
      age: 20
    }
  };

  router.pushUrl({
    url: 'pages/Detail', // Target URL.
    params: paramsInfo // Add the params attribute to transfer custom parameters.
  }, (err) => {
    if (err) {
      console.error(`Invoke pushUrl failed, code is ${err.code}, message is ${err.message}`);
      return;
    }
    console.info('Invoke pushUrl succeeded.');
  })
}
On the target page, you can call the getParams() API of the Router module to obtain the passed parameters. Example:
import router from '@ohos.router';

class InfoTmp {
  age: number = 0
}

class RouTmp {
  id: object = () => {
  }
  info: InfoTmp = new InfoTmp()
}

const params: RouTmp = router.getParams() as RouTmp; // Obtain the passed parameter object.
const id: object = params.id // Obtain the value of the id attribute.
const age: number = params.info.age // Obtain the value of the age attribute.
Page Return
Implement the page return feature so that users can return to the previous page or a specified page. You can pass parameters to the target page during the return process.
Figure 2 Page return
Before using the Router module, import it first.
import router from '@ohos.router';
You can use any of the following methods to return to a page:
-
Method 1: Return to the previous page.
import router from '@ohos.router';
router.back();
This method allows you to return to the position of the previous page in the page stack. For this method to work, the previous page must exist in the page stack.
-
Method 2: Return to a specific page.
Return to the page through a common route.
import router from '@ohos.router';
router.back({
  url: 'pages/Home'
});
Return to the page through a named route.
import router from '@ohos.router';
router.back({
  url: 'myPage' // myPage is the alias of the page to return to.
});
This method allows users to return to a page with the specified path. For this method to work, the target page must exist in the page stack.
-
Method 3: Return to a specific page and pass custom parameters.
Return to the page through a common route.
import router from '@ohos.router';
router.back({
  url: 'pages/Home',
  params: {
    info: 'From Home Page'
  }
});
Return to the page through a named route.
import router from '@ohos.router';
router.back({
  url: 'myPage', // myPage is the alias of the page to return to.
  params: {
    info: 'From Home Page'
  }
});
This method not only allows you to return to the specified page, but also pass in custom parameter information during the return process. The parameter information can be obtained and parsed by invoking the router.getParams() API on the target page.
On the target page, call the router.getParams() API at the position where parameters need to be obtained, for example, in the onPageShow() lifecycle callback:
import router from '@ohos.router';

@Entry
@Component
struct Home {
  @State message: string = 'Hello World';

  onPageShow() {
    const params = router.getParams() as Record<string, string>; // Obtain the passed parameter object.
    if (params) {
      const info: string = params.info as string; // Obtain the value of the info attribute.
    }
  }
  ...
}
NOTE
When the router.back() API is used to return to a specified page, all pages between the top page (included) and the specified page (excluded) are pushed from the page stack and destroyed.
If the router.back() method is used to return to the original page, the original page will not be created repeatedly. Therefore, the variable declared using @State will not be declared repeatedly, and the aboutToAppear() lifecycle callback of the page will not be triggered. If you want to use the custom parameters transferred from the returned page on the original page, you can parse the parameters in the required position. For example, parameter parsing can be performed in the onPageShow() lifecycle callback.
Adding a Confirmation Dialog Box Before Page Return
During application development, to prevent misoperations or data loss, a dialog box needs to be displayed before a user returns from one page to another, asking the user whether to perform the operation.
Such a dialog box can be in the default style or custom style.
Figure 3 Adding a confirmation dialog box before page return

Default Confirmation Dialog Box
To implement this function, you can use the router.showAlertBeforeBackPage() and router.back() APIs provided by the Router module.
Before using the Router module, import it first.
import router from '@ohos.router';
To enable the confirmation dialog box for page return, call the router.showAlertBeforeBackPage() API (for setting the information about the dialog box), then the router.back() API. For example, define a click event processing function for the back button on the payment page:
import router from '@ohos.router';
import { BusinessError } from '@ohos.base';

// Define a click event processing function for the back button.
function onBackClick(): void {
  // Invoke the router.showAlertBeforeBackPage() API to set the information about the confirmation dialog box.
  try {
    router.showAlertBeforeBackPage({
      message: 'Payment not completed yet. Are you sure you want to return?' // Set the content of the confirmation dialog box.
    });
  } catch (err) {
    let message = (err as BusinessError).message
    let code = (err as BusinessError).code
    console.error(`Invoke showAlertBeforeBackPage failed, code is ${code}, message is ${message}`);
  }

  // Invoke the router.back() API to return to the previous page.
  router.back();
}
The router.showAlertBeforeBackPage() API receives an object as a parameter. The object contains the following attributes:
message: content of the dialog box. The value is of the string type. If the API is called successfully, the confirmation dialog box is displayed on the target page. Otherwise, an exception is thrown and the error code and error information is obtained through err.code and err.message.
When the user clicks the back button, a confirmation dialog box is displayed, prompting the user to confirm their operation. If the user selects Cancel, the application stays on the current page. If the user selects OK, the router.back() API is triggered and the redirection is performed based on the parameters.
Custom Confirmation Dialog Box
To implement a custom confirmation dialog box, use APIs in the PromptAction module or customize a popup window. This topic uses the APIs in the PromptAction module an example to describe how to implement a custom confirmation dialog box.
Before using the Router module, import it first.
import router from '@ohos.router';
In the event callback, call the promptAction.showDialog() API of the PromptAction module.
import router from '@ohos.router';
import promptAction from '@ohos.promptAction';
import { BusinessError } from '@ohos.base';

function onBackClick() {
  // Display a custom confirmation dialog box.
  promptAction.showDialog({
    message:'Payment not completed yet. Are you sure you want to return?',
    buttons: [
      {
        text: 'Cancel',
        color: '#FF0000'
      },
      {
        text: 'OK',
        color: '#0099FF'
      }
    ]
  }).then((result:promptAction.ShowDialogSuccessResponse) => {
    if (result.index === 0) {
      // The user selects Cancel.
      console.info('User canceled the operation.');
    } else if (result.index === 1) {
      // The user selects OK.
      console.info('User confirmed the operation.');
      // Invoke the router.back() API to return to the previous page.
      router.back();
    }
  }).catch((err:Error) => {
    let message = (err as BusinessError).message
    let code = (err as BusinessError).code
    console.error(`Invoke showDialog failed, code is ${code}, message is ${message}`);
  })
}
When the user clicks the back button, the custom confirmation dialog box is displayed, prompting the user to confirm their operation. If the user selects Cancel, the application stays on the current page. If the user selects OK, the router.back() API is triggered and the redirection is performed based on the parameters.
Named Route
To redirect to a page in a shared package, you can use router.pushNamedRoute().
Figure 4 Named route redirection

Before using the Router module, import it first.
import router from '@ohos.router';
In the target page in the shared package, name the @Entry decorated custom component.
// library/src/main/ets/pages/Index.ets
// library is the custom name of the new shared package.
@Entry({ routeName: 'myPage' })
@Component
export struct MyComponent {
  build() {
    Row() {
      Column() {
        Text('Library Page')
          .fontSize(50)
          .fontWeight(FontWeight.Bold)
      }
      .width('100%')
    }
    .height('100%')
  }
}
When the configuration is successful, import the named route page to the page from which you want to redirect.
import router from '@ohos.router';
import { BusinessError } from '@ohos.base';
const module = import('library/src/main/ets/pages/Index');  // Import the named route page in the shared package.
@Entry
@Component
struct Index {
  build() {
    Flex({ direction: FlexDirection.Column, alignItems: ItemAlign.Center, justifyContent: FlexAlign.Center }) {
      Text('Hello World')
        .fontSize(50)
        .fontWeight(FontWeight.Bold)
        .margin({ top: 20 })
        .backgroundColor('#ccc')
        .onClick(() => { // Click to go to a page in another shared package.
          try {
            router.pushNamedRoute({
              name: 'myPage',
              params: {
                data1: 'message',
                data2: {
                  data3: [123, 456, 789]
                }
              }
            })
          } catch (err) {
            let message = (err as BusinessError).message
            let code = (err as BusinessError).code
            console.error(`pushNamedRoute failed, code is ${code}, message is ${message}`);
          }
        })
    }
    .width('100%')
    .height('100%')
  }
}