HPM Part Development
HPM Part Development Overview
You can search for common development resources on DevEco Marketplace and import required resources to your projects through dependencies. If you cannot find the desired resources there, develop the resources on your own and publish them in the form of an HPM Part. To develop HPM Parts, install the hpm-cli tool first.
NOTE
You are advised to perform the following operations on Ubuntu 18.04 or later.
Installing hpm-cli
The hpm-cli tool is developed based on Node.js. Therefore, you must install Node.js and then use npm to install hpm-cli.
Installing Node.js and hpm-cli
-
Install Node.js. Download Node.js from its official website and install it on your local PC.
You are advised to install the latest LTS version (not earlier than 12.x) of Node.js.
-
Install the hpm-cli tool using npm delivered with Node.js. Run the following command:
npm install -g @ohos/hpm-cli -
Run the following command to check whether the installation is successful. If a hpm version is displayed, the installation is successful.
hpm -V or hpm --version -
(Optional) Run the following command to update the hpm version if needed:
npm update -g @ohos/hpm-cli
(Optional) Configuring hpm-cli
After hpm-cli is installed, run the following command to view the hpm configuration:
hpm config
The default hpm configuration is displayed upon successful command execution. You can modify the default configuration as required. The following lists the common hpm configuration:
registry = https://hpm.harmonyos.com
### login Settings
# loginUser = invitation_code

#### Path Settings
shellPath = C:\WINDOWS\System32\cmd.exe
# shellPath = C:\Program Files\Git\bin\sh.exe
# globalRepo = C:\Users\username\.hpm\global

#### Network Settings
# no_proxy = *.server.com
# http_proxy = http://user:pwd@proxy_server:port
# https_proxy = http://user:pwd@proxy_server:port
# strictSsl = true

#### Other Settings
# privateSupport = true|false
# ignoreBundles = @ohos/llvm,@ohos/gn,
# OSPlatform = Auto|linux|darwin|win32
Creating an HPM Part
You can create an HPM Part by using a template or define an existing project as an HPM Part.
Creating an HPM Part Using a Template
-
Run the following command to create a directory:
hpm init -t default mybundle NOTE
-In the preceding command, default indicates that the default template is used. You can use another template such as simple or dist.
NOTE
-In the preceding command, default indicates that the default template is used. You can use another template such as simple or dist.The generated directory structure is as follows:
/ ├── headers # Header file (example) │ └── main.h └── src # Source code (example) │ └─ main.c ├── bundle.json # Metadata declaration file └── LICENSE # License └── Makefile # Build description file (example) └── README.md # Readme file -
Write the code and build script of the HPM Part.
hpm init -t {templatename} -d {dir} {name} NOTE-
-t {templatename} indicates the template name.
-
-d {dir} indicates the path for storing the HPM Part to be created.
-
name indicates the name of the HPM Part to be created.
-
The hpm-cli tool provides a few default templates. More templates are available on DevEco Marketplace. You can run the hpm search -t template command to search for a template stored on DevEco Marketplace.

Defining an Existing Project as an HPM Part
If you have a code project and need to distribute it on the HPM platform, run the following command in the project directory, for example, mybundle2:
hpm init
-
Enter an HPM Part name (mybundle2 for example) and press Enter.
-
Enter the version and description. A bundle.json file will be generated in the current directory.
-
Open the bundle.json file.
$ hpm init Your bundle will be created in directory ~\demo\mybundle2 ? bundle name mybundle2 ? version 1.0.0 ... Initialization finished. -
Modify other information (such as the author, code repository, code directories, scripts, and dependencies) in bundle.json. An example is shown below:
{
"name": "mybundle2",
"version": "1.0.0",
"publishAs": "code-segment",
"dirs":{
    ".":["README.md"],
    "src":["test.c"],
    "header":["header/test.h" ],
    "src/common":["src/common/foobar.txt"]
  },
"scripts": {
    "build": "make -${args}"
  },
"dependencies": {
    "@ohos/cjson": "^1.0.0",
    "@ohos/foobar": "^1.2.0"
  }
}
Defining a Distribution
In the distribution metadata file, define the dependent HPM Parts and how to build and link them to generate image files.
The following uses the bundle.json file as an example. In this example, the dist command uses the hb framework.
{
  "name": "@your/dist_name",
  "version": "2.2.0",
  "publishAs": "distribution",
  "description": "describe it",
  "scripts": {
    "config_hb": "hb set -root $DEP_BUNDLE_BASE",
    "dist": "PATH=/root/.local/bin:${DEP_OHOS_gn}:${DEP_OHOS_ninja}/ninja:${DEP_OHOS_llvm}/llvm/bin:${DEP_OHOS_hc_gen}/hc-gen:${PATH} && ./scripts/dist.sh"
  },
  "envs": {
    "debug": false
  },
  "dirs": {
    "scripts": "scripts/*"
  },
  "dependencies": {
    "@ohos/build_lite": "2.2.0",
    "@ohos/gn": "1.1.1",
    "@ohos/llvm": "1.1.1",
    "@ohos/hc_gen": "1.1.0",
    "@ohos/ninja": "1.1.0",
    ......
  },
  "ohos": {
    "os": "2.2-Beta",
    "board": "hi3516",
    "kernel": "liteos-a"
  },
  "keywords": ["hispark", "hi3516"],
  "repository": "https://gitee.com/openharmony/your-project",
  "license": "Apache V2"
}
Building an HPM Part
If the code of an HPM Part can be independently built, you can configure the build tool and scripts to generate binary files.
The hpm-cli tool supports command integration so that you can select any build tool (such as make, gcc, and gn) suitable for your project. You only need to define the build command in scripts in the bundle.json file of your project, and then run the hpm build command to start the build.
Defining the Build Script
This section describes how to build an executable file named helloworld in the app directory.
app
├── BUILD.gn
├── include
│   └── helloworld.h
└── src
    └── helloworld.c
Create a BUILD.gn file in the same directory as helloworld.c.
touch BUILD.gn
vim BUILD.gn
The following is an example of BUILD.gn:
executable("hello_world") {
    sources = [
        "src/helloworld.c"
    ]

    include_dirs = [
        "include"
    ]
}
NOTE
executable is a built-in template of gn. You can run the gn help executable command to view how to use this template.
sources represents the source code path, and include_dirs represents the header file path.
Executing the Build Script
Run the following command to start the build:
hpm build
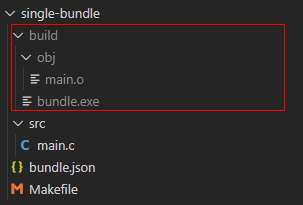
After all build operations are complete, the message "build succeed" is displayed. You need to check the build result.
Building an Image
Run the following command in the root directory of the current distribution:
hpm dist
The hpm-cli tool automatically starts the build. After the build is complete, an image file will be generated, as shown below:
out
|-xxdist.img
|-xx.file
Publishing an HPM Part
To publish an HPM Part, you must obtain an account and create an organization (or join an existing organization). For details, see the online help on DevEco Marketplace.
After that, generate a public key on the local PC based on your invitation code (which can be obtained on the My profile page on DevEco Marketplace), and configure the public key on the My profile page.
hpm config set loginUser {your-invitation-code}
hpm gen-keys
The generated file will be stored in ~\Users\yourname.hpm\key. Copy the content in the public key file publicKey_your-account.pem to the SSH public key on your My profile page.
Now you have the permission to publish HPM Parts in your organization.
In the directory where the HPM Part is located, run the following command to pack and publish the HPM Part:
hpm publish
NOTE
To avoid HPM Part name conflicts, name an HPM Part in the format of @org_name/bundle_name.
Your account must also be a member of org_name so that you can publish or update HPM Parts in the organization.
The published HPM Parts take effect only after security and content reviews.
Using an HPM Part
Using a Part
When developing a project, you usually need to reference other HPM Parts to accelerate development of specific functions. Installing dependencies could be a good way.
Visit DevEco Marketplace, search for HPM Parts that meet your service requirements by keywords, and then introduce them to your project. The typical operation procedure is as follows:
-
Run the hpm init command to create a bundle description file named bundle.json, which contains dependencies and other metadata such as the name and version.
-
Run the hpm install
command to install the dependency. The dependency will be written into the dependencies field in bundle.json. -
Reference the header file in the code to implement the function.
-
Run the hpm build command to perform build and output the build result.
Run the following command in your project. Make sure that the project directory contains the bundle.json file.
$ hpm install @scope/the_bundle
The referenced HPM Part will be installed under ohos_bundle in the directory where your project is located. The directory structure is as follows:
project
├── ohos_bundle
│   └── scope
│    └─ the_bundle     # <--- Referenced HPM Part
└── src
│    └─ main.c
├── bundle.json        # Metadata declaration file
└── LICENSE
└── Makefile
└── README.md
Open the bundle.json file. You will see that the HPM Part has been introduced to the dependencies of your project.
{
  "dependencies": {
    "@scope/the_bundle": "^1.0.0"
  }
}
You can edit the dependencies of multiple HPM Parts in this file.
{
  "dependencies": {
    "@scope/the_bundle1": "^1.0.0",
    "@scope/the_bundle2": "^2.0.0",
    "@scope/the_bundle3": "^3.0.0",
    "@scope/the_bundle4": "^1.1.0"
  }
}
Run the hpm install command again to download and install all HPM Parts that have not been installed.
Installing Global HPM Parts
If the referenced HPM Part is shared by multiple projects, for example, the compiler toolchain, you can install it globally.
Run the following command in your project. Make sure that the project directory contains the bundle.json file.
$ hpm install -g @scope/the_tool
The referenced HPM Part will be installed in the directory specified by the globalRepo parameter of the hpm config command.
~\.hpm\global\ohos_bundles
│   └── scope
│    └─ the_tool     # <--- Referenced HPM Part
NOTE
- For an HPM Part installed in a project, you can reference it using the environment variable DEP_SCOPE_bundle_name when running the hpm build command. For example, after you run hpm i @opensource/gn to install an HPM Part, edit the build script in the bundle.json file as follows:
"scripts": {
   "build": "${DEP_OPENSOURCE_gn}/gn  --version"
 },
Then, you can run the hpm build command to call gn functions.
- For a globally installed HPM Part, you can directly call the HPM Part using an environment variable or reference the HPM Part using the ${key}/tool_name parameter in the hpm config set key value command. Example:
hpm i -g @ohos/opensource/gn
hpm config BUILD_SYS_GN ~/.hpm/global/ohos_bundles/opensource/gn
You can edit the build script in the bundle.json file as follows:
"scripts": {
   "build": "${BUILD_SYS_GN}/gn  --version"
 },
Then, you can run the hpm build command to call gn functions.