Combo Solution – ASR Chip Porting Case
The IoT combo solution (Wi-Fi+BLE) is developed based on the OpenHarmony LiteOS-M kernel. This document exemplifies how to port code of the DEV.WIFI.A development board powered by the ASR582X chip.
Compilation and Porting
Directory Planning
In the directory structure of this solution, the board vendor code is decoupled from the SoC vendor code.
device
├── board                                --- Board vendor directory
│   └── lango                            --- Board vendor: Lango
│       └── dev_wifi_a                   --- Board name: DEV.WIFI.A
└── soc                                  --- SoC vendor directory
    └── asrmicro                         --- SoC vendor: ASR
        └── asr582x                      --- SoC series: ASR582X
The planned product demo directory is as follows:
vendor
└── asrmicro                             --- Vendor of the product demo.
    ├── wifi_demo                        --- Product demo name.
    └── xts_demo                         --- Product name.
Product Definition
The following uses vendor/asrmicro/wifi_demo as an example to describe the kernel, board, and subsystem used by the product. The kernel, board model, and board vendor need to be planned in advance, which are involved in the precompilation instruction (hb set). The information entered here corresponds to the planned directory. Example:
{
    "product_name": "wifi_demo",          --- Product name.
    "type": "mini",                       --- System type: mini.
    "version": "3.0",                     --- System version: 3.0
    "device_company": "lango",            --- Board vendor: Lango.
    "board": "dev_wifi_a",                --- Board name: dev_wifi_a.
    "kernel_type": "liteos_m",            --- Kernel type: liteos_m.
    "kernel_version": "3.0.0",            --- Kernel version: 3.0.0.
    "subsystems": []                      --- Subsystem.
}
device_company and board are used to associate the //device/board/<device_company>/
Board Configuration
In this example, the device/board/lango/dev_wifi_a directory is used. Place the config.gni file in the liteos_m directory. This configuration file is used to describe the board information, including the CPU, toolchain, kernel, and compile flags. Sample code:
# Kernel type
kernel_type = "liteos_m"

# Kernel version
kernel_version = "3.0.0"

# Board CPU Type
board_cpu = "cortex-m4"

# Toolchain. Here, arm-none-eabi is used.
board_toolchain = "arm-none-eabi"

# Toolchain path. You can use the system path by entering "", or a custom path.
board_toolchain_path = rebase_path("//device/soc/asrmicro/gcc/gcc-arm-none-eabi/Linux64/bin")

# Board-specific compilation parameters
board_cflags = []

# Board-specific link parameters
board_ld_flags = []

# Board-specific header file
board_include_dirs = []
Precompiling
After the product directory, product definition, and board settings are correctly configured, run the precompilation command hb set in the project root directory. Then you can find the related product in the displayed list.

After selecting a product, press Enter. The ohos_config.json file is automatically generated in the root directory. Information about the product to be compiled is listed here.
Kernel Porting
Kconfig Adaptation
During the compilation of //kernel/liteos_m, you need to use the Kconfig file for indexing in the corresponding board and SoC directory.
Kconfig in the board directory, for example, //device/board/lango:
├── dev_wifi_a                                   --- dev_wifi_a board configuration
│   ├── Kconfig.liteos_m.board                   --- Board configuration options
│   ├── Kconfig.liteos_m.defconfig.board         --- Default configuration of the board
│   └── liteos_m
│       └── config.gni                           --- Board configuration file
├── Kconfig.liteos_m.boards                      --- Boards configuration of the board vendor
└── Kconfig.liteos_m.defconfig.boards            --- Default boards configuration of the board vendor
In dev_wifi_a/Kconfig.liteos_m.board, BOARD_DEV_WIFI_A can be selected only when SOC_ASR5822S is selected.
config BOARD_DEV_WIFI_A
    bool "select board DEV_WIFI_A"
    depends on SOC_ASR5822S
Kconfig in the SoC directory, for example, //device/soc/asrmicro:
├── asr582x                                      --- ASR582X series
│   ├── Kconfig.liteos_m.defconfig.asr5822s      --- Default configuration of the ASR5822S chip
│   ├── Kconfig.liteos_m.defconfig.series        --- Default configuration of the ASR582X series
│   ├── Kconfig.liteos_m.series                  --- Configuration of the ASR582X series
│   └── Kconfig.liteos_m.soc                     --- ASR582X chip configuration
├── Kconfig.liteos_m.defconfig                   --- SoC default configuration
├── Kconfig.liteos_m.series                      --- Series configuration
└── Kconfig.liteos_m.soc                         --- SoC configuration
In asr582x/Kconfig.liteos_m.series:
config SOC_SERIES_ASR582X
    bool "ASR582X Series"
    select ARM
    select SOC_COMPANY_ASRMICRO              --- Select SOC_COMPANY_ASRMICRO.
    select CPU_CORTEX_M4
    help
        Enable support for ASR582X series
SOC_ASR5822S can be selected in asr582x/Kconfig.liteos_m.soc only when SOC_SERIES_ASR582X is selected.
choice
    prompt "ASR582X series SoC"
    depends on SOC_SERIES_ASR582X

config SOC_ASR5822S                         --- Select SOC_ASR5822S.
    bool "SoC ASR5822S"

endchoice
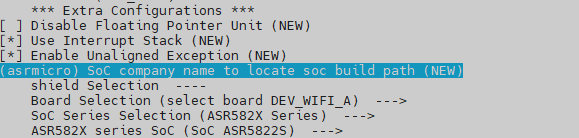
To compile the board BOARD_DEV_WIFI_A, you need to select SOC_COMPANY_ASRMICRO, SOC_SERIES_ASR582X, and SOC_ASR5822S. You can do so by running make menuconfig in kernel/liteos_m.
The configurations are saved in //vendor/asrmicro/wifi_demo/kernel_configs/debug.config by default. You can directly modify the configurations in debug.config.
LOSCFG_BOARD_DEV_WIFI_A=y
LOSCFG_SOC_COMPANY_ASRMICRO=y
LOSCFG_SOC_SERIES_ASR582X=y
LOSCFG_SOC_ASR5822S=y
Modular Compilation
The compilation of Board and SoC adopts the modular compilation method, starting from kernel/liteos_m/BUILD.gn and increasing by level. The adaptation process of this solution is as follows:
-
Create the BUILD.gn file in
//device/board/langoand add the following content to the file:if (ohos_kernel_type == "liteos_m") { import("//kernel/liteos_m/liteos.gni") module_name = get_path_info(rebase_path("."), "name") module_group(module_name) { modules = [ "dev_wifi_a", --- Board module "hcs", --- Module corresponding to the hcs file ] } }In the preceding BUILD.gn file, dev_wifi_a and hcs are the module names organized by directory level.
-
In
//device/soc/asrmicro, use the same method to create the BUILD.gn file and add the following content to the file:if (ohos_kernel_type == "liteos_m") { import("//kernel/liteos_m/liteos.gni") module_name = get_path_info(rebase_path("."), "name") module_group(module_name) { modules = [ "asr582x", ] } } -
In the
//device/soc/asrmicromodule at each level, add the BUILD.gn file and compile the module. The following uses//device/soc/asrmicro/asr582x/liteos_m/sdk/startup/BUILD.gnas an example:import("//kernel/liteos_m/liteos.gni") config("public") { include_dirs = [ "." ] --- Common header file } kernel_module("asr_startup") { --- Module for compilation sources = [ --- Source file for compilation "startup.c", "board.c", "startup_cm4.S", ] include_dirs = [ --- Header files used in the include "...", ] } -
To organize links and some compilation options, the following parameters are set in config("public") in
//device/soc/asrmicro/asr582x/liteos_m/sdk/config/BUILD.gn:config("public") { include_dirs = [] --- Common header file ldflags = [] --- Link parameters, including the ld file libs = [] --- Link library defines = [] --- Definition NOTE
It is recommended that common parameter options and header files not be repeatedly filled in all components.
NOTE
It is recommended that common parameter options and header files not be repeatedly filled in all components. -
To organize some product applications, this solution adds list to the config.json file of the vendor. The following uses
//vendor/asrmicro/wifi_demo/config.jsonas an example to describe how to add list to the config.json file:"tests_list": [ --- demo list { "enable": "true", --- list switch "test_modules": [ "example", --- OS basic demo "wifi_test" --- Wi-Fi demo ] } ]The demo is managed as a module. To enable or disable a demo, add or delete items in tests_list.tests_list can be directly read in GN. You need to add the following content to
//device/board/lango/dev_wifi_a/liteos_m/config.gni:product_conf = read_file("${product_path}/config.json", "json") product_name = product_conf.product_name tests_list = product_conf.tests_listAfter reading the list, you can add related component libraries to the corresponding link options. Add the following content to
//device/soc/asrmicro/asr582x/liteos_m/sdk/config/BUILD.gn:foreach(test_item, tests_list) { test_enable = test_item.enable if(test_enable == "true") { foreach(test_module, test_item.test_modules) { ldflags += [ "-l${test_module}" ] } } }
C Library Adaptation
To ensure that the entire system does not distinguish the user mode and kernel mode, the upper-layer components and kernel share the same musl-based C library. This solution uses the musl C library. For details about the third-party library, see //third_party/musl/porting/liteos_m/kernel/BUILD.gn.
In addition, the kernel modifies and adapts the code for malloc. For details about the adaptation file, see //kernel/liteos_m/kal/libc/musl/porting/src/malloc.c.
In this solution, printf-related APIs are implemented using open-source code. For details about the adaptation file, see //device/soc/asrmicro/asr582x/liteos_m/sdk/drivers/platform/system/printf-stdarg.c.
The wrap links of the printf-related APIs need to be added to the //device/board/lango/dev_wifi_a/liteos_m/config.gni file so that these APIs can be invoked.
board_ld_flags += [
  "-Wl,--wrap=printf",
  "-Wl,--wrap=sprintf",
  "-Wl,--wrap=snprintf",
  "-Wl,--wrap=vprintf",
  "-Wl,--wrap=vsprintf",
  "-Wl,--wrap=vsnprintf",
]
Shell Adaptation
To facilitate debugging, this solution integrates the shell component of the kernel. You can select Enable Shell in Debug of make menuconfig or enter LOSCFG_SHELL=y in the //vendor/asrmicro/wifi_demo/kernel_configs/debug.config file.
The shell component needs to be initialized. For details, see device/soc/asrmicro/asr582x/liteos_m/sdk/startup/board.c.
ret = LosShellInit();
if (ret != LOS_OK) {
    printf("LosShellInit failed! ERROR: 0x%x\n", ret);
}
ret = OsShellInit();
if (ret != LOS_OK) {
    printf("OsShellInit failed! ERROR: 0x%x\n", ret);
}
After initialization, each shell command needs to be registered, for example, vendor/asrmicro/wifi_demo/tests/wifi/wifi_app.c:
osCmdReg(CMD_TYPE_STD, "wifi_open", 0, (CMD_CBK_FUNC)ap_conn_func);    --- Connect to the AP. Input parameters can be carried.
osCmdReg(CMD_TYPE_EX, "wifi_close", 0, (CMD_CBK_FUNC)ap_close_func);   --- Disconnect from the AP.
Kernel Boot Adaptation
After the board enters the main function, it is initialized. After that, interrupts are registered, and then the kernel is initialized and scheduled.
For details about interrupt registration, see //device/soc/asrmicro/asr582x/liteos_m/sdk/startup/board.c.
ArchHwiCreate(UART1_IRQn,configLIBRARY_NORMAL_INTERRUPT_PRIORITY,0,UART1_IRQHandler,0);   --- UART interrupt
ArchHwiCreate(GPIO_IRQn,configLIBRARY_NORMAL_INTERRUPT_PRIORITY,0,GPIO_IRQHandler,0);     --- GPIO interrupt
The following is an example of kernel initialization:
osStatus_t ret = osKernelInitialize();                                                    --- Kernel initialization

if(ret == osOK)
{
    threadId = osThreadNew((osThreadFunc_t)sys_init,NULL,&g_main_task);                   --- Create the init thread.

    if(threadId!=NULL)
    {
        osKernelStart();                                                                  --- Thread scheduling
    }
}
In sys_init, you need to initialize the OpenHarmony system components.
...
DeviceManagerStart();           --- Initialize HDF.

OHOS_SystemInit();              --- Initialize OpenHarmony system components.
....
HDF Framework Adaptation
HDF provides a set of unified APIs for applications to access hardware, simplifying application development. To add the HDF component, you need to add it to //vendor/asrmicro/wifi_demo/kernel_configs/debug.config:
LOSCFG_DRIVERS_HDF=y
LOSCFG_DRIVERS_HDF_PLATFORM=y
In addition, you need to add the hardware configuration description file of the corresponding development board to board. The file is stored in //device/board/lango/hcs. This example takes the GPIO and UART as an example. The porting process is as follows:
GPIO Adaptation
-
The chip driver adaptation file is stored in the
//drivers/hdf_core/adapter/platformdirectory. Add thegpio_asr.cfile to thegpiodirectory, and add the compilation conditions of the new driver file toBUILD.gn.if (defined(LOSCFG_SOC_COMPANY_ASRMICRO)) { sources += [ "gpio_asr.c" ] } -
The driver description file in
gpio_asr.cis as follows:struct HdfDriverEntry g_GpioDriverEntry = { .moduleVersion = 1, .moduleName = "ASR_GPIO_MODULE_HDF", .Init = GpioDriverInit, .Release = GpioDriverRelease, }; HDF_INIT(g_GpioDriverEntry); -
Add the GPIO hardware description file
gpio.hcsto//device/board/lango/hcs. The mapped GPIO0 controls the programmable LED on the board. GPIO1 corresponds to the user key. The HCS content is as follows:root { platform { gpio_config { match_attr = "gpio_config"; pin = [0, 1]; // led3: GPIO9 // user key: GPIO7 realPin = [9, 7]; config = [5, 1]; pinNum = 2; } } } -
The configuration information of
gpio.hcsis loaded in GpioDriverInit, and the corresponding GPIO pins are initialized. The application layer needs only the following simple code to control LED indicators and read key information:int32_t GpioKeyIrqFunc(uint16_t gpio, void *data) { printf("user key %d pressed\n", gpio); } GpioSetIrq(1, OSAL_IRQF_TRIGGER_FALLING, GpioKeyIrqFunc, NULL); GpioWrite(0, 0); lega_rtos_delay_milliseconds(1000); GpioWrite(0, 1);
UART Adaptation
-
The chip driver adaptation file is stored in the
//drivers/adapter/platformdirectory. Add theuart_asr.canduart_asr.hfiles to theuartdirectory, and add the compilation conditions of the new driver file toBUILD.gn.if (defined(LOSCFG_SOC_COMPANY_ASRMICRO)) { sources += [ "uart_asr.c" ] } -
The driver description file in
uart_asr.cis as follows:struct HdfDriverEntry g_hdfUartDevice = { .moduleVersion = 1, .moduleName = "HDF_PLATFORM_UART", .Bind = HdfUartDeviceBind, .Init = HdfUartDeviceInit, .Release = HdfUartDeviceRelease, }; HDF_INIT(g_hdfUartDevice); -
Add the GPIO hardware description file
uart.hcsto//device/board/lango/hcs. The HCS content is as follows:controller_uart0 :: uart_controller { match_attr = "asr582x_uart_0"; port = 0; /* UART_ID_0 */ pin_tx_pin = 0; /* IO_PIN_10 */ pin_tx_mux = 25; /* IO_MUX_2 */ pin_rx_pin = 1; /* IO_PIN_11 */ pin_rx_mux = 25; /* IO_MUX_2 */ tx_rx = 3; /* TX_RX MODE */ } -
The configuration information of
gpio.hcsis loaded inHdfUartDeviceInit, and the corresponding serial port pins are initialized. The code for testing the serial port at the application layer is as follows:DevHandle uart_handle = UartOpen(0); UartSetBaud(uart_handle, 115200); ... attr.dataBits = UART_ATTR_DATABIT_8; attr.parity = UART_ATTR_PARITY_NONE; attr.stopBits = UART_ATTR_STOPBIT_1; ret = UartSetAttribute(uart_handle, &attr); ret = UartWrite(uart_handle, send_data, strlen(send_data)); ret = UartRead(uart_handle, recv_data, sizeof(recv_data) - 1); ...
OpenHarmony Component Porting
The compilation option entry of the subsystem is in the config.json file of the corresponding product. The following uses //vendor/asrmicro/wifi_demo/config.json as an example.
LWIP component
The source code of the lwIP component is stored in //third_party/lwip. The kernel in OpenHarmony is customized in //kernel/liteos_m/components/net/lwip-2.1, including the redefinition of some interfaces and structures.
In this example, the path for setting lwip in the config.json file is as follows:
"subsystem": "kernel",
"components": [
  {
    "component": "liteos_m",
    "features": [
      "ohos_kernel_liteos_m_lwip_path = \"//device/soc/asrmicro/asr582x/liteos_m/components/net/lwip-2.1\""
    ]
  }
]
Enable lwIP compilation in the kernel_config/debug.config file.
LOSCFG_NET_LWIP=y
Security Component
For the security component, enable the corresponding options in config.json. In this example, mbedtls (//third_party/mbedtls) in the third-party library is used as the encryption module. The options are as follows:
"subsystem": "security",
"components": [
  { "component": "huks", "features":
    [
      ...
      "ohos_security_huks_mbedtls_porting_path = \"//device/soc/asrmicro/asr582x/liteos_m/components/mbedtls\""
    ]
  }
]
In the preceding directory, you need to configure mbedtls. For details, see config/config_liteos_m.h. Note that if the RNG capability of mbedtls is used (for example, the dsoftbus component is used in //foundation/communication/dsoftbus/adapter/common/mbedtls/softbus_adapter_crypto.c), the entropy source for generating random numbers must be specified. In this example, the hardware random number capability of the ASR582X is used. You need to enable the following macro:
#define MBEDTLS_ENTROPY_HARDWARE_ALT
After this macro is enabled, the entropy_hardware_alt interface needs to be implemented. For details, see library/entropy_hardware_alt.c.
wifi_lite Component
The options of the wifi_lite component are as follows:
"subsystem": "communication",
"components": [
  { "component": "wifi_lite", "features":[] }
  ]
Wi-Fi-related functions are implemented in //device/soc/asrmicro/asr582x/liteos_m/sdk/hal/src/wifi_adapter.c.
This example also provides a demo that uses the wifi_lite interfaces. For details, see //vendor/asrmicro/wifi_demo/tests/wifi/wifi_app.c. The following two connection test commands are provided:
Table 1 ASR Wi-Fi connection commands
| Command | Parameter | Description |
|---|---|---|
| wifi_open | sta [SSID] [KEY] | Connection routing command, for example, wifi_open sta ASR_AP test123456. |
| wifi_close | N/A | Command for disconnecting a connection. |
XTS component
To adapt the XTS component, for example, //vendor/asrmicro/xts_demo/config.json, add the following component options:
"subsystem": "xts",
"components": [
  { "component": "xts_acts", "features":
    [
      "enable_ohos_test_xts_acts_use_thirdparty_lwip = true"
    ]
  },
  { "component": "xts_tools", "features":[] }
]
The XTS function is also organized using list. You can add or delete modules in the config.json file by referring to [Modular Compilation].
"xts_list": [
  {
    "enable": "true",
    "xts_modules": [
      "ActsKvStoreTest",
      "ActsDfxFuncTest",
      "ActsHieventLiteTest",
      "ActsSamgrTest",
      "ActsParameterTest",
      "ActsWifiServiceTest",
      "ActsWifiIotTest",
      "ActsBootstrapTest"
    ]
  }
],
dsoftbus component
The dsoftbus component provides the discovery, connection, networking, and transmission capabilities between devices. This solution uses the DSoftBus capability between Wi-Fi devices as an example.
Dependent components: lwIP, security, and wifi_lite.
Prerequisites: The device is connected to a router, and all networking devices are in the same LAN.
The options of the dsoftbus component are as follows:
"subsystem": "communication",
"components": [
  { "component": "dsoftbus", "features":[] }
  ]
The dsoftbus test demo is provided in //vendor/asrmicro/wifi_demo. To enable this function, modify //vendor/asrmicro/wifi_demo/tests/BUILD.gn.
declare_args() {
  asr_dsoftbus_test = true              --- Enable dsoftbus demo compilation.
}
Add the dsoftbus_test module to the //vendor/asrmicro/wifi_demo/config.json file.
"tests_list": [
    {
    "enable": "true",
    "test_modules": [
        "wifi_test",
        "dsoftbus_test"                 --- Enable the dsoftbus_test module.
    ]
    }
]
For details about the startup interface of the dsoftbus component, see //vendor/asrmicro/wifi_demo/tests/dsoftbus/dsoftbus_app.c.
InitSoftBusServer();
At least 80 KB RAM needs to be reserved for the running of the DSoftBus component. If the resources are insufficient, other parts such as the lwIP component can be tailored.
//kernel_liteos_m/blob/master/components/net/lwip-2.1/porting/include/lwip/lwipopts.h:
#define TCPIP_THREAD_STACKSIZE 0x2000 --- Reduce the size of the TCP/IP task stack.
The -fPIC compilation option is added to the communication_dsoftbus repository. In this way, the compiler generates position-independent code and uses relative addresses. However, the LiteOS-M core uses a static library, which is not recommended.
You are advised to manually comment out the -fPIC compilation option in the following files:
//foundation/communication/dsoftbus/core/common/BUILD.gn
//foundation/communication/dsoftbus/core/frame/BUILD.gn
//foundation/communication/dsoftbus/sdk/BUILD.gn
//foundation/communication/dsoftbus/components/nstackx_mini/nstackx_ctrl/BUILD.gn
The DSoftBus networking requires device authentication. In the R&D phase, you can skip the authentication and focus on the networking and transmission capabilities. You need to replace the HandleReceiveDeviceId function in the //foundation/communication/dsoftbus/core/authentication/src/auth_manager.c file with the following implementation:
void HandleReceiveDeviceId(AuthManager *auth, uint8_t *data)
{
    uint8_t tempKey[SESSION_KEY_LENGTH] = {0};
    if (auth == NULL || data == NULL) {
        SoftBusLog(SOFTBUS_LOG_AUTH, SOFTBUS_LOG_ERROR, "invalid parameter");
        return;
    }
    if (AuthUnpackDeviceInfo(auth, data) != SOFTBUS_OK) {
        SoftBusLog(SOFTBUS_LOG_AUTH, SOFTBUS_LOG_ERROR, "AuthUnpackDeviceInfo failed");
        AuthHandleFail(auth, SOFTBUS_AUTH_UNPACK_DEVID_FAILED);
        return;
    }
    if (auth->side == SERVER_SIDE_FLAG) {
        if (EventInLooper(auth->authId) != SOFTBUS_OK) {
            SoftBusLog(SOFTBUS_LOG_AUTH, SOFTBUS_LOG_ERROR, "auth EventInLooper failed");
            AuthHandleFail(auth, SOFTBUS_MALLOC_ERR);
            return;
        }
        if (AuthSyncDeviceUuid(auth) != SOFTBUS_OK) {
            AuthHandleFail(auth, SOFTBUS_AUTH_SYNC_DEVID_FAILED);
        }
        (void)memset_s(tempKey, SESSION_KEY_LENGTH, 1, SESSION_KEY_LENGTH);
        AuthOnSessionKeyReturned(auth->authId, tempKey, SESSION_KEY_LENGTH);
        return;
    }
    //VerifyDeviceDevLvl(auth);                                            --- Comment out the authentication process.
    (void)memset_s(tempKey, SESSION_KEY_LENGTH, 1, SESSION_KEY_LENGTH);
    AuthOnSessionKeyReturned(auth->authId, tempKey, SESSION_KEY_LENGTH);
}
After correct configuration, compilation, and burning, the device uses the wifi_open command to connect to the router. After the connection is successful, the device automatically performs networking.
The adaptation process of other components is similar to that of other vendors.